A healing break from the city, from Tokyo to Mount Fuji
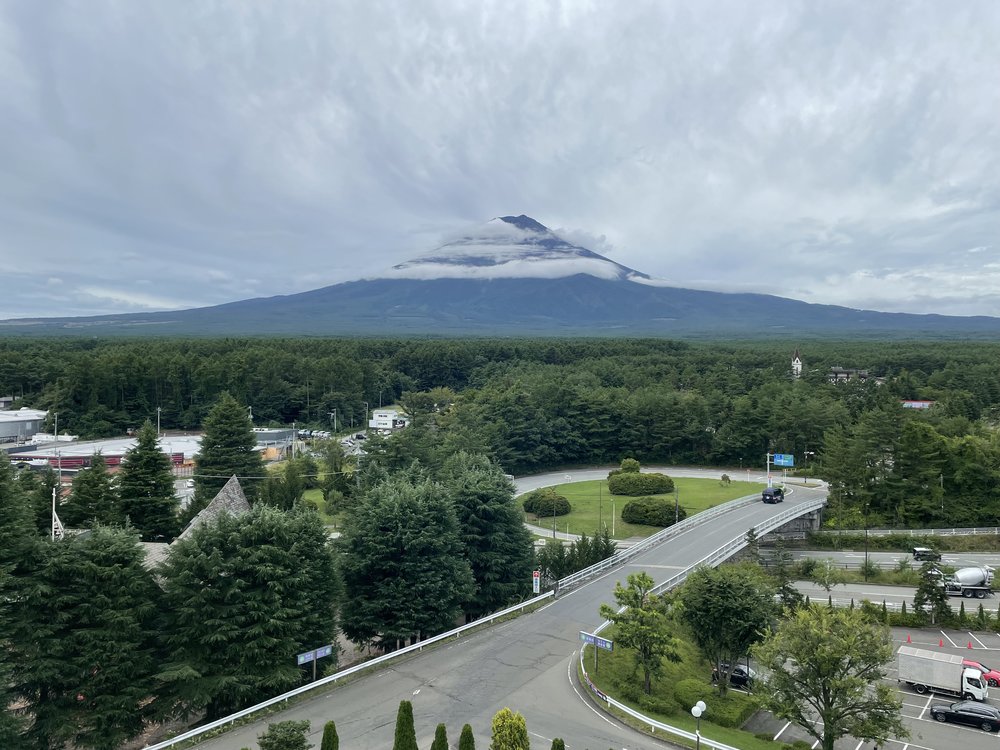
While there are endless things to do in Tokyo, we decided to take a break from the vibrant capital and head to The Fuji Five Lake (Fujigoko) region for cooler air, a slower pace, and the calming embrace of nature. Situated in Yamanashi Prefecture, bordering Shizuoka, you can easily reach Fujigoko by train in about two hours max – making it a perfect getaway even just for a day. Although with so many things to do and incredible views to see, one day might not be enough because for us – it definitely wasn’t!

Did you know? Lake Motosuko is the one pictured on the 1000 yen bill! The lake is also part of the Fuji Five Lake Region (Fujigoko) along with Kawaguchiko, Saiko, Yamanakako, and Shojiko.

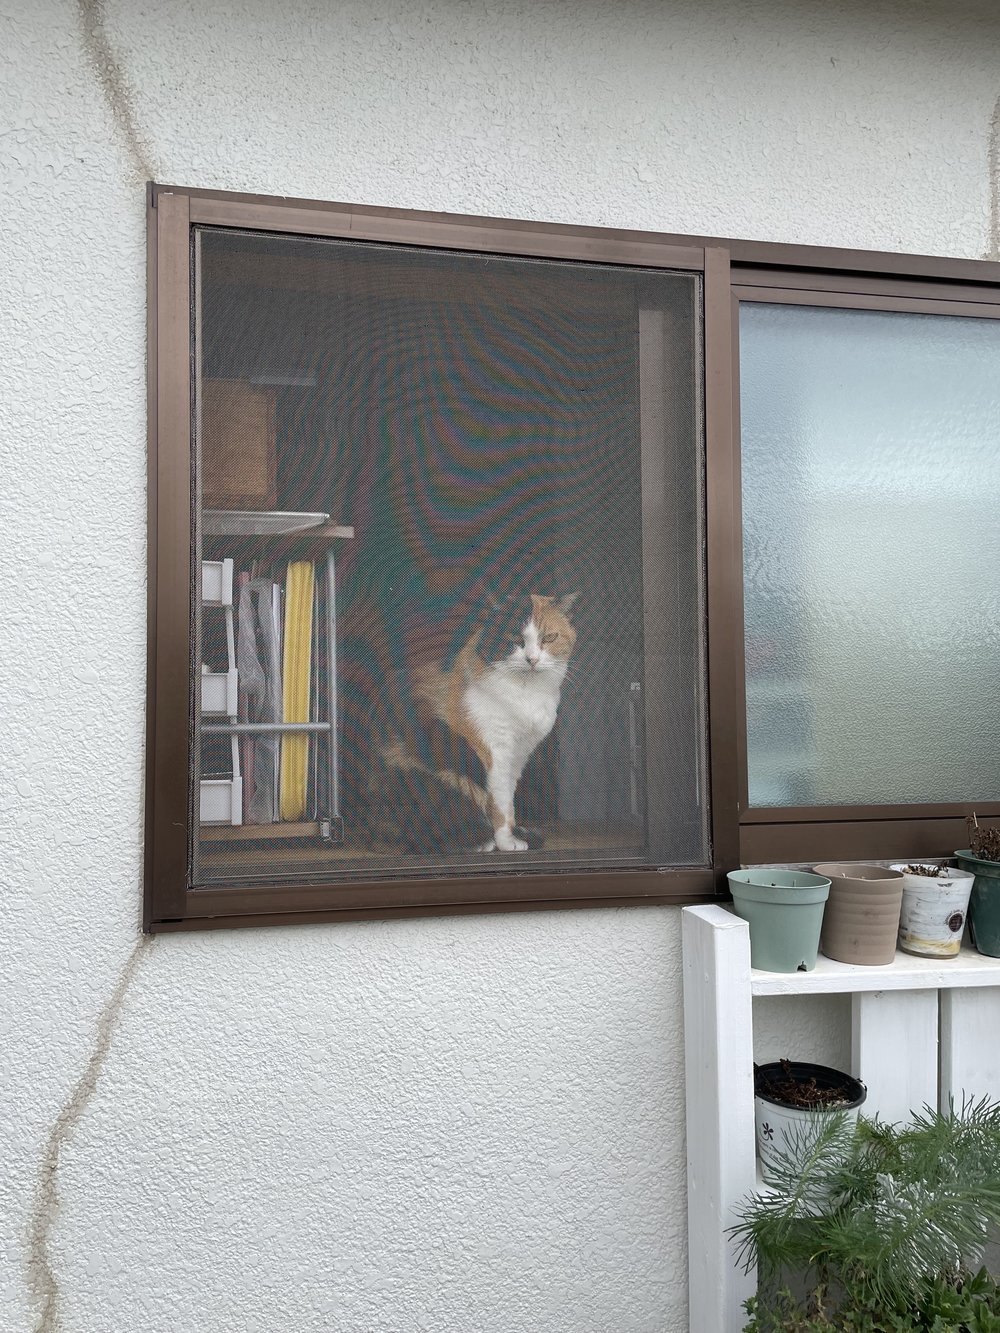
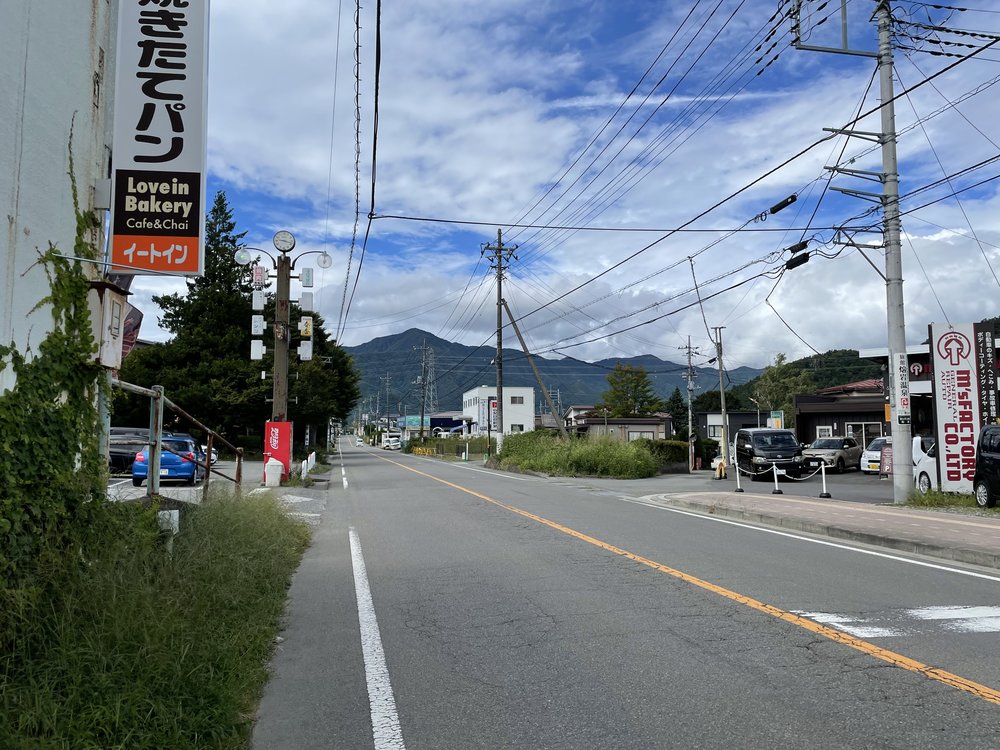
Walking through the narrow streets of rural Japan, discovering local coffee shops, and spotting chunky cats along the way, we instantly knew that this side-trip wasn’t meant to be limited to only a day. In between these pockets of simple joys, we also learned how to make soba, rode record-breaking coasters with Mt. Fuji as our view, and even created our very own glassware to take home, to name a few. Not only did we max out our phones’ storage but our three-day stay as well! So if you’re looking for an itinerary to make the most out of your trip, check out how we mapped out ours around the iconic and ever-inspiring Fuji-san.
🍣 Japan Essentials🍣
🚅Trains & Airport Transfers
📌Mobile Data & Metro Passes
How to get to Mt. Fuji from Tokyo
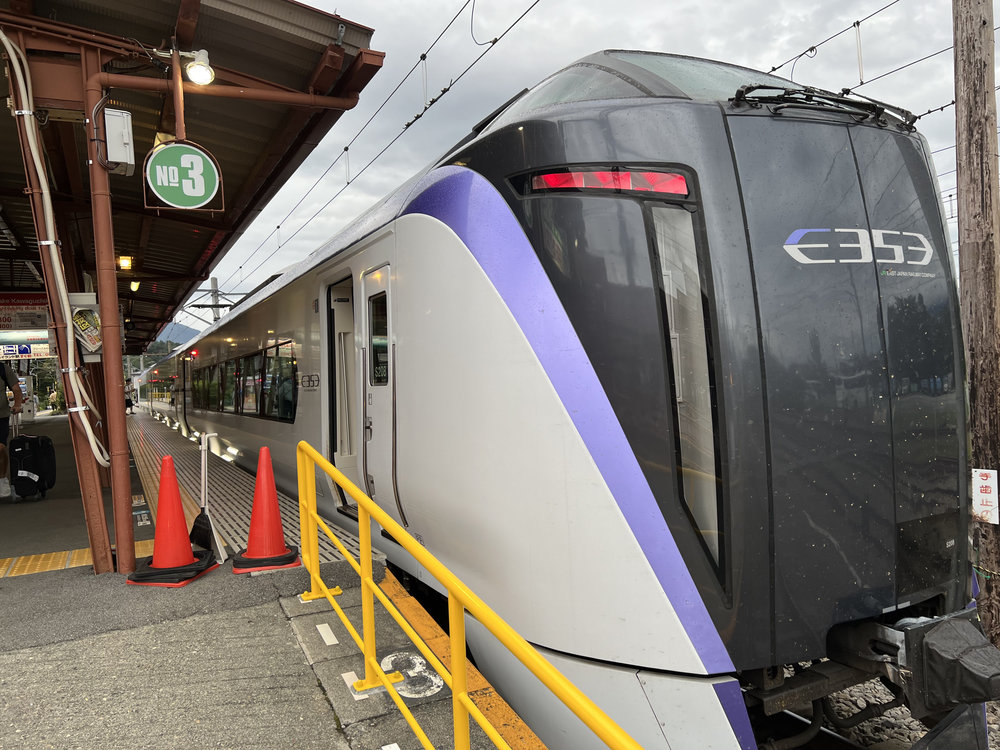
There are several ways to get to Mt. Fuji, you can choose to take the bus, book a private car charter, get a car rental, or take the train. The most convenient one for us was the Fuji Excursion train, it’s a limited express train that takes you from Shinjuku JR Station all the way to its last stop in Kawaguchiko Station.
Fuji Excursion stops to expect:
Shinjuku(JR) → Tachikawa → Hachioji → Otsuki → Tsuru-bunkadaigaku-mae → Mt. Fuji Station→ Fujikyu Highlands → Kawaguchiko

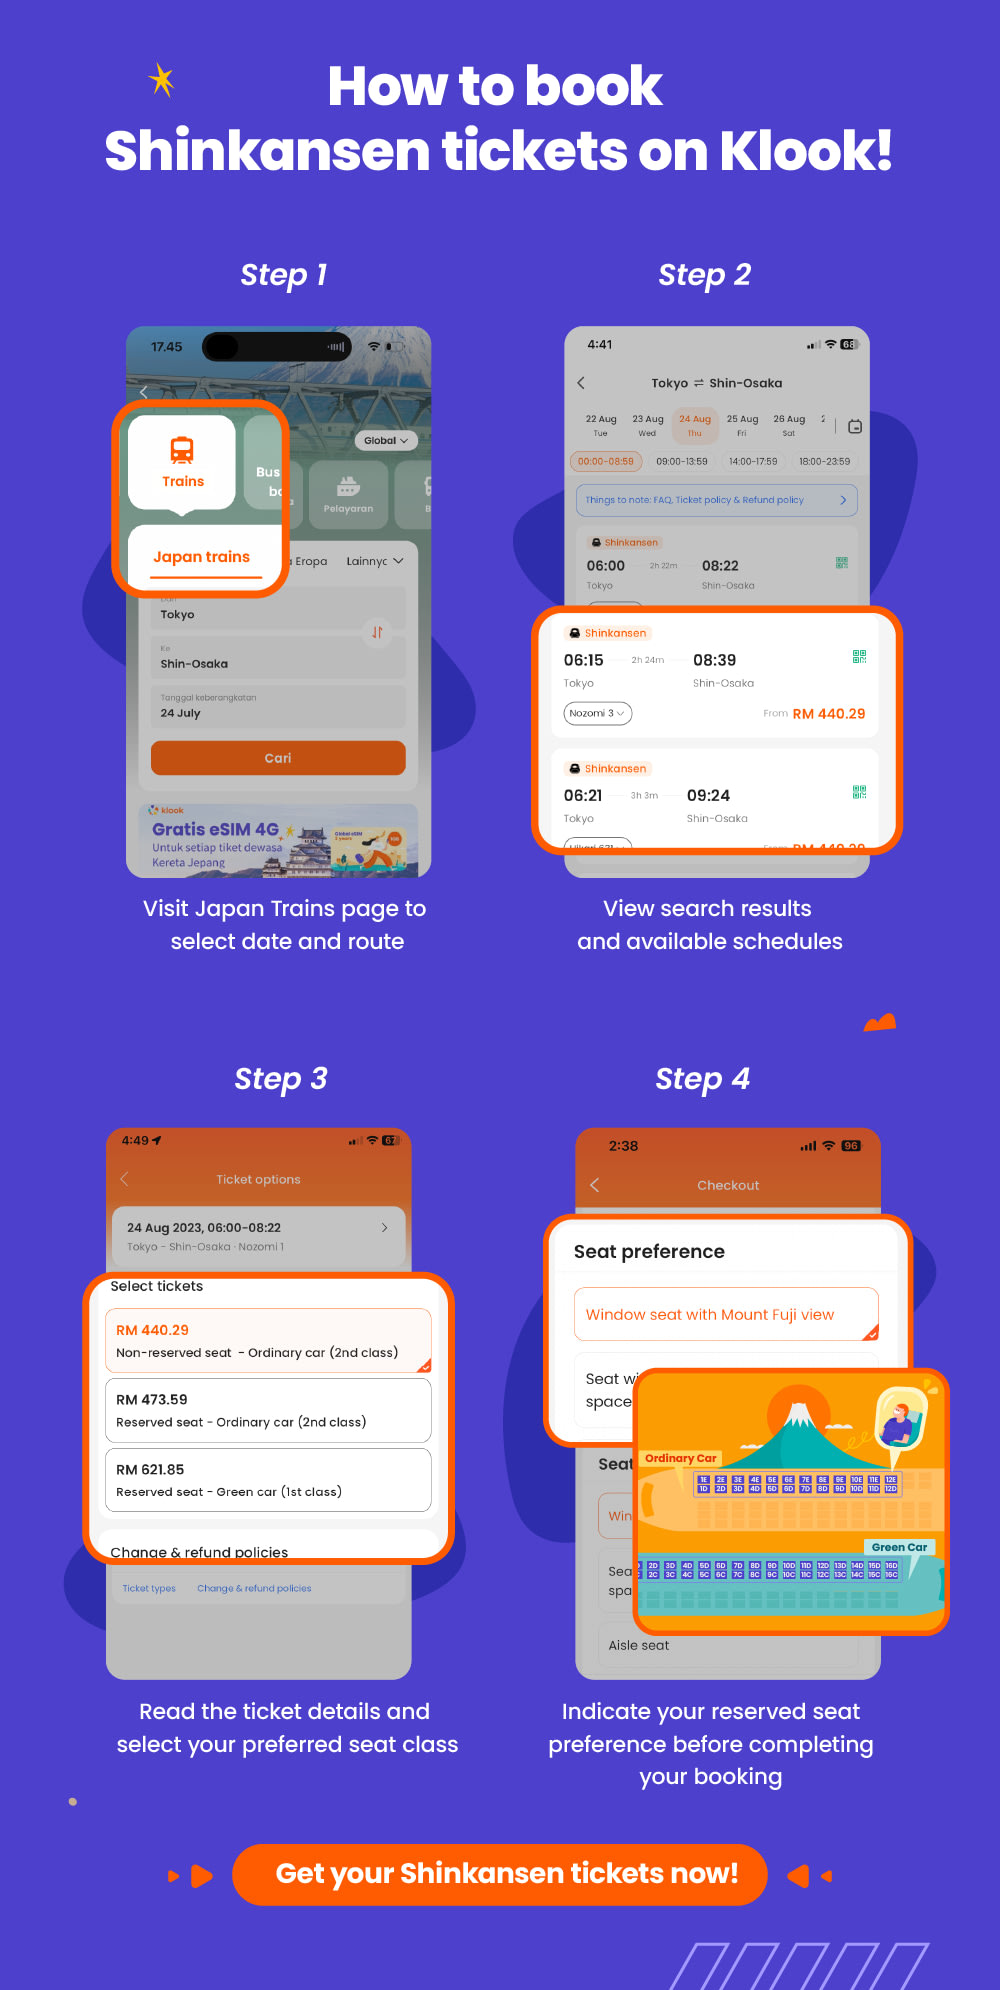
You have the option to buy your Fuji Excursion Train tickets directly via the Shinkansen & Express ticket machines in the station or online via the Klook app. We booked ours on the app so we could use our local currency (e.g., e-wallets, credit/debit cards) and save our Japanese Yen for snacks and other finds. Following the steps below, we inputted “Shinjuku” to “Otsuki” (you may also put “Kawaguchiko” but for this itinerary, we’re starting with Otsuki).
Klook Tip: Fuji Excursion train tickets (including one-way and round trip) MUST BE picked up at JR Shinjuku station or other JR East stations in Tokyo. The train stations in the Mt. Fuji area are not directly managed by JR East, so you CANNOT pick up any tickets there. You will need physical tickets to hop on the trains.
How to get around the Fuji Five Lake Region

Before exploring and getting to all the planned activities, we picked up our Mt. Fuji Pass at the ticket counter in Otsuki Station. If you head to Kawaguchiko Station instead, you could also claim it there. The Mt. Fuji Pass was our key to getting around the Five Five Lakes Region (i.e., access to Otsuki to Kawaguchiko via train and Fujikyu buses), it was also our pass into major attractions like Fuji-Q Highland, the Mt. Fuji Panoramic Ropeway, and the Lake Kawaguchiko Sightseeing Boat (also known as the ‘Kawaguchiko Excursion Ship’) – the pass isn’t limited to just these, these were just the ones we were able to do in our itinerary. When you book the pass, you also have the option to choose the length of validity – 1, 2, or 3 Days.
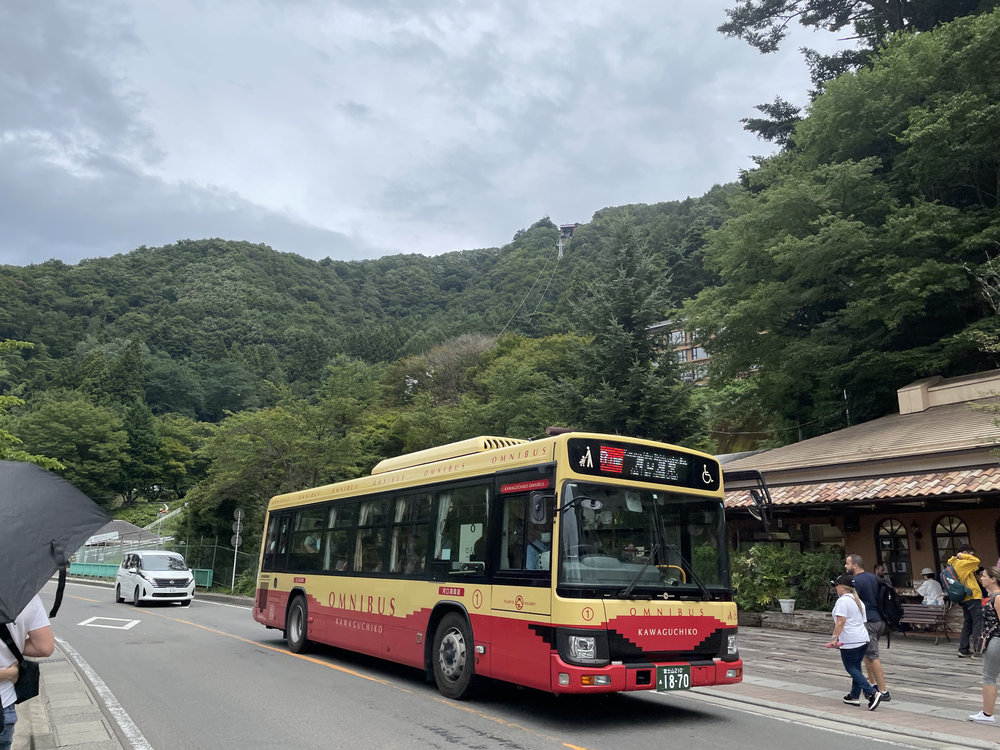
In Kawaguchiko Station alone, you’ll find many buses that can take you to wherever you need to go and that accept the Mt. Fuji Pass. You can check out the bus lines and their stops ahead of your trip on the Kawaguchiko website. There are also taxis and car rentals available if you’d like to cut down travel time and enjoy a scenic drive in Yamanashi Prefecture.
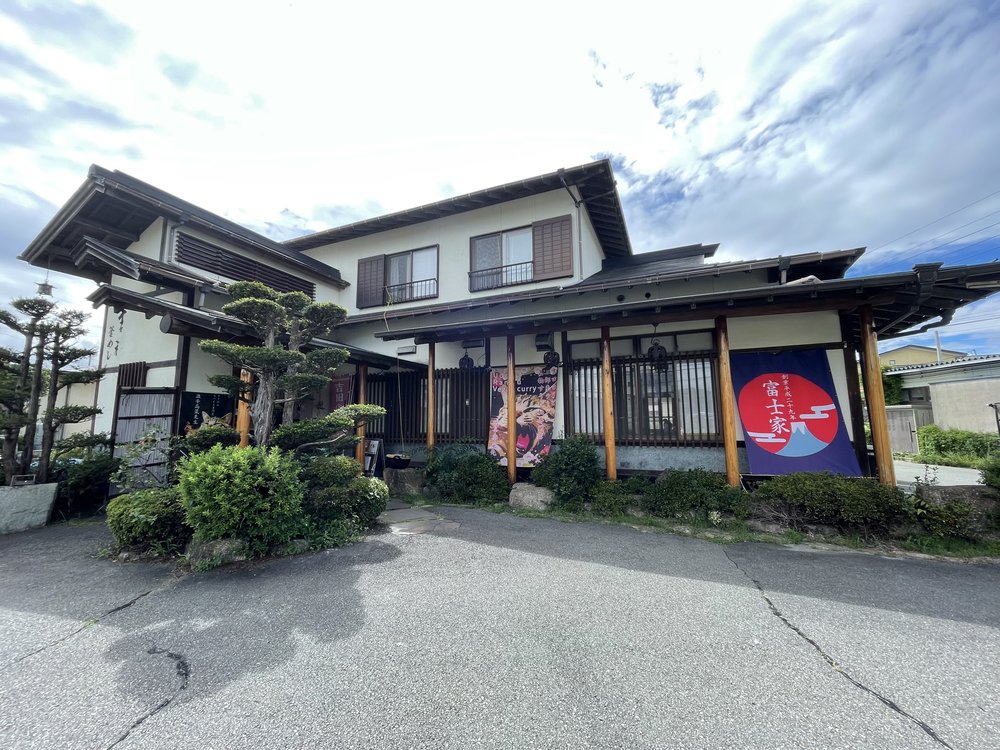
Where to stay near Mt. Fuji
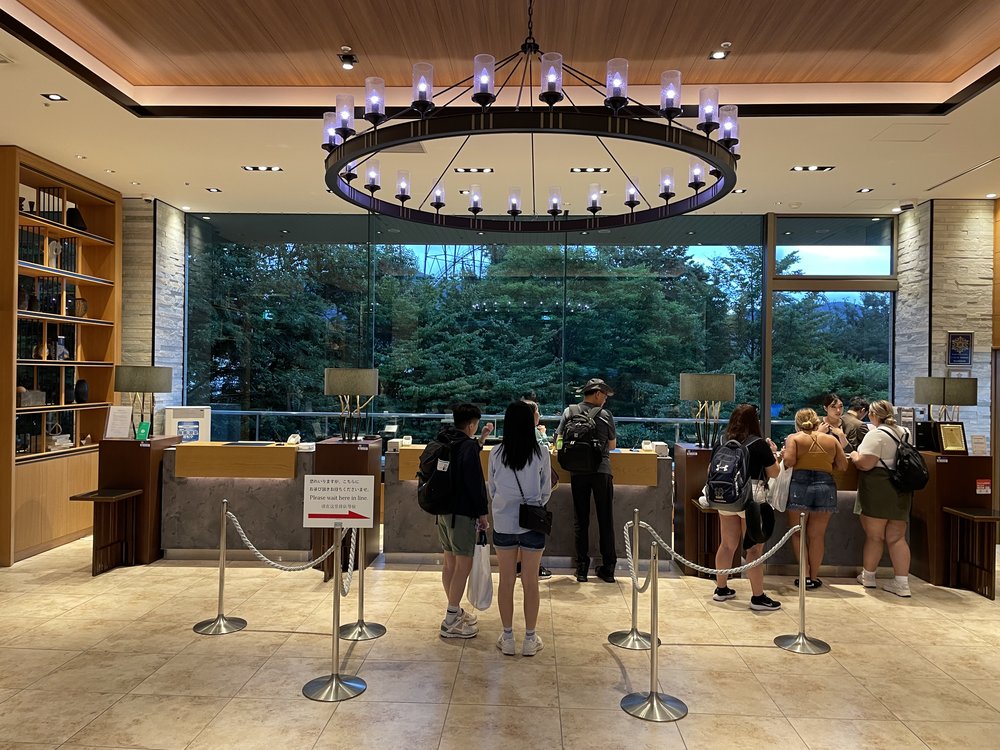
When checking out hotels near Mt. Fuji, we made sure to choose one that was most convenient (apart from having unobstructed views of Japan’s cultural icon, of course)! Since our itinerary included Fuji-Q Highland and Fujiyama Onsen, we decided on Highland Resort Hotel & Spa.
Klook Tip: If you’re staying in Highland Resort Hotel & Spa, you get FREE access to Fujiyama Onsen and Fujiyama Museum as well as early entry into Fuji-Q Highland – 15 minutes before official opening hours! FYI they’re right next door!
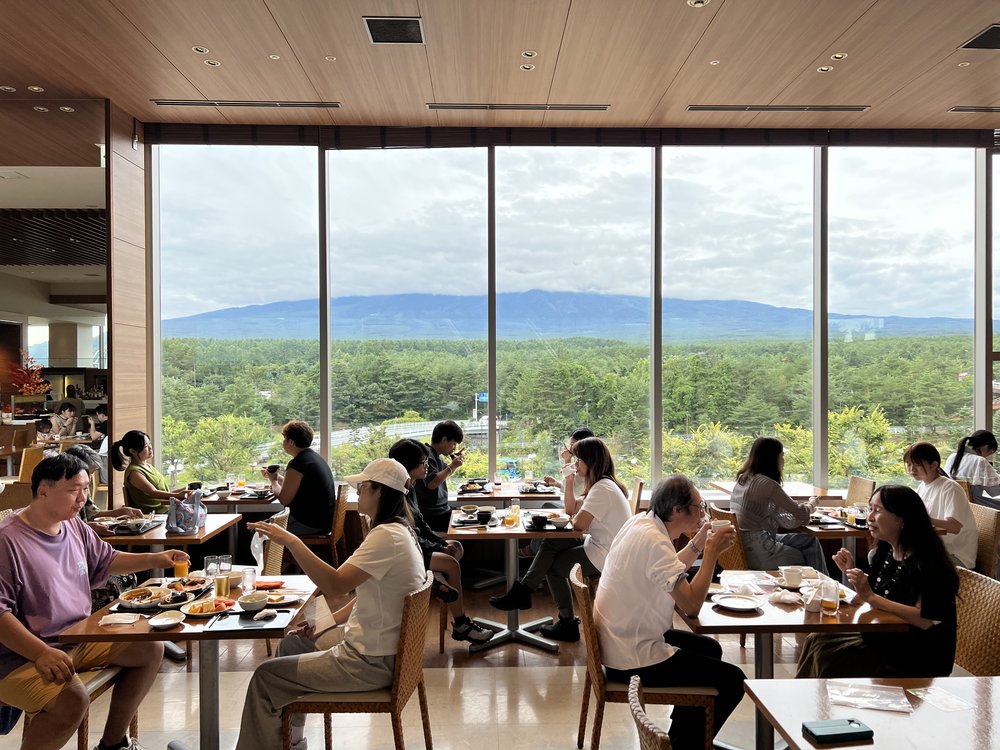
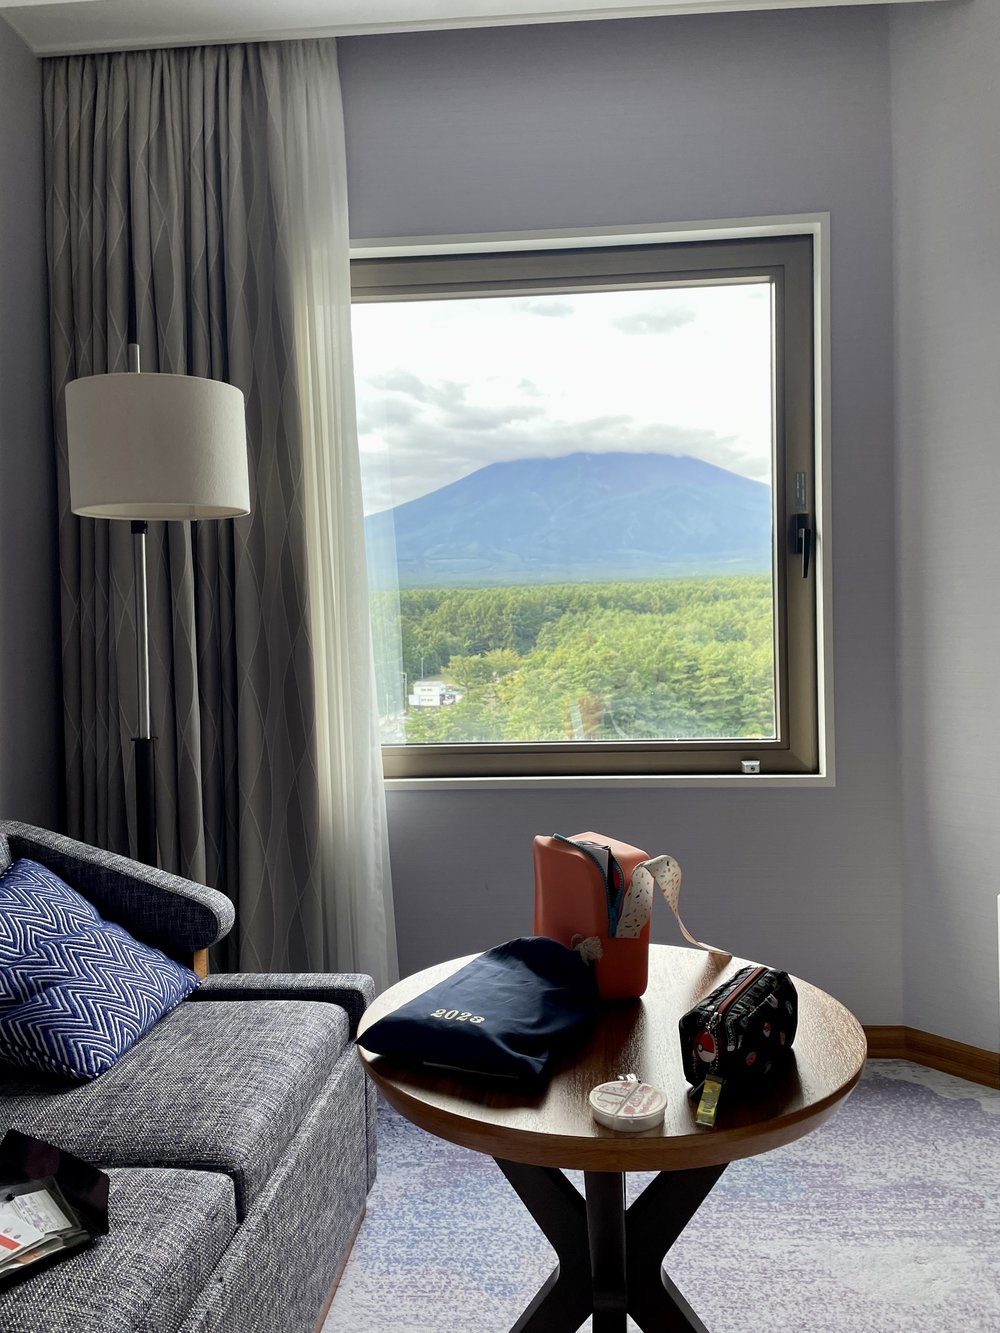
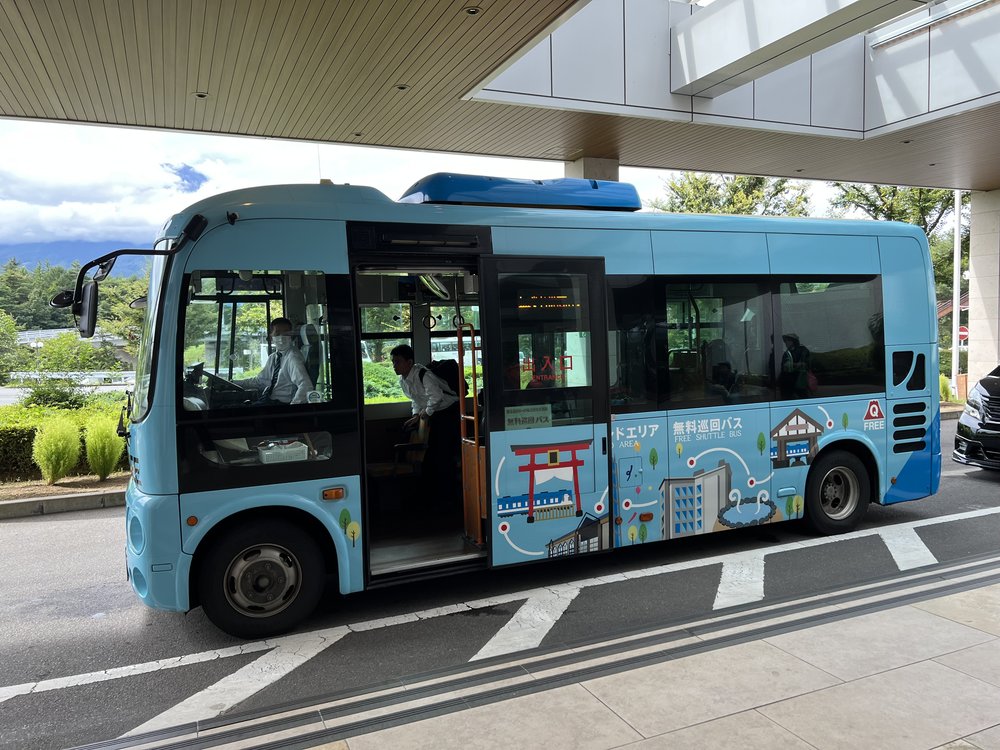
Our stay at Highland Resort Hotel & Spa allowed us to reach all the activities we had planned, it was situated perfectly! Apart from being right next to Fuji-Q Highland, Fujiyama Onsen, and Fujiyama Museum, there’s also a Fujikyu loop shuttle bus that’s free for guests of all Fujikyu’s facilities. So if you’re coming from or going to either Kawaguchiko Station or Mt. Fuji Station, you can take this shuttle bus to the hotel and to any of the other Fujikyu facilities (e.g., Fujisan World Heritage Center, Highland Station Inn, etc).
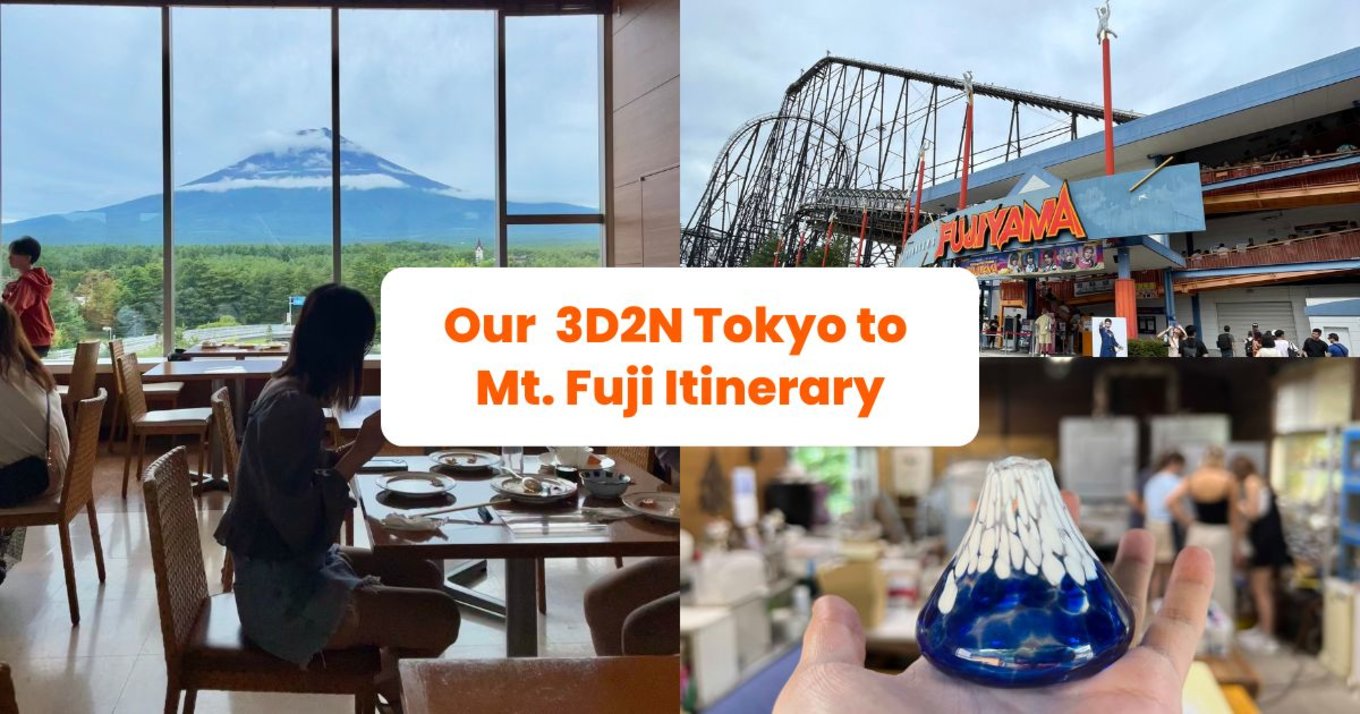
Our Complete 3D2N Tokyo to Mt. Fuji Itinerary
Now that we’ve covered the basics for your trip to Mt. Fuji, here are all the things we did that fit a 3D2N itinerary. Enjoy!
Day 1
We kicked off our day extra early so we could get our luggage ready for transport and have a filling breakfast, after all… it was going to be an almost two-hour train ride from Shinjuku Station in Tokyo and we booked the 09:30 AM Fuji Excursion to make the most of our first day. However, if you happen to miss your first meal of the day, you can always buy food on the go and eat on the train.
Klook Tip: Instead of having to lug around our heavy baggage, we used a luggage delivery service to transport them directly to our next hotel. There are popular luggage delivery services like Yamato to make travel within Japan easier. You can also always ask your hotel concierge for assistance, many hotels can organize the service for you.
Since we stayed at Keio Plaza Hotel, the walk to Shinjuku Station only took around 10 minutes. It’s true when they say that Shinjuku Station can get crazy, especially during rush hour, so you want to keep an eye out for the ticket machines with the green logo that also says, “Shinkansen & Express Tickets”. Since we booked our Fuji Excursion train tickets ahead, all we had to do was look for the QR code redeem option on the screen, scan our QR code from our online booking, and wait for our tickets to be printed out. Easy! The next step was ensuring we followed the assigned car number and seats.

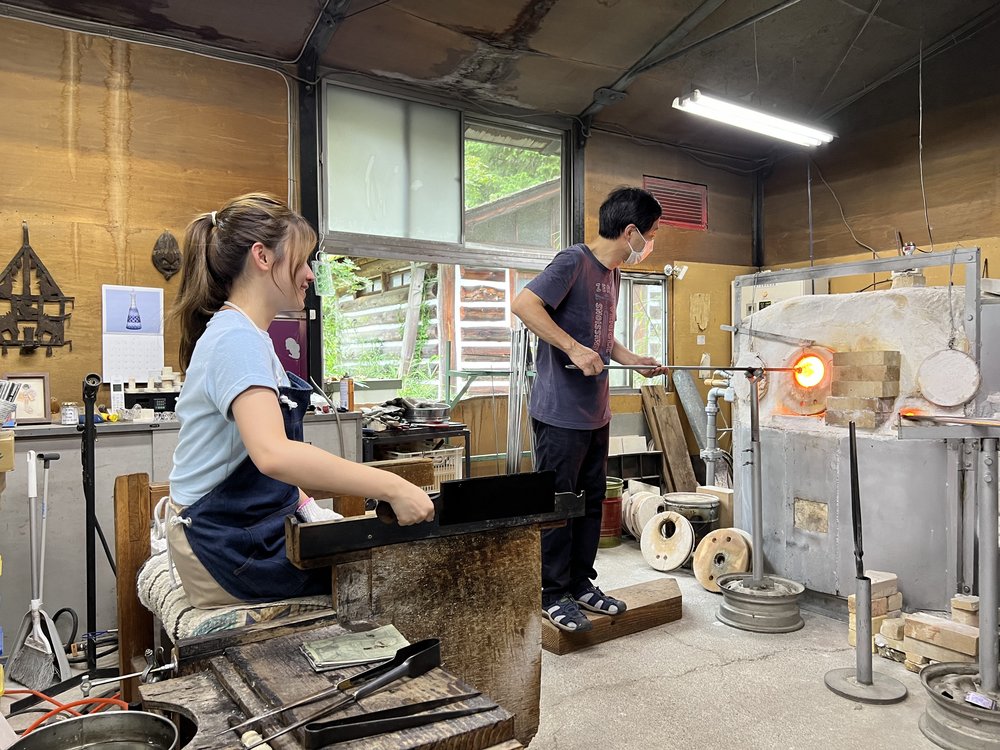
Glassblowing our very own mini Mt. Fuji
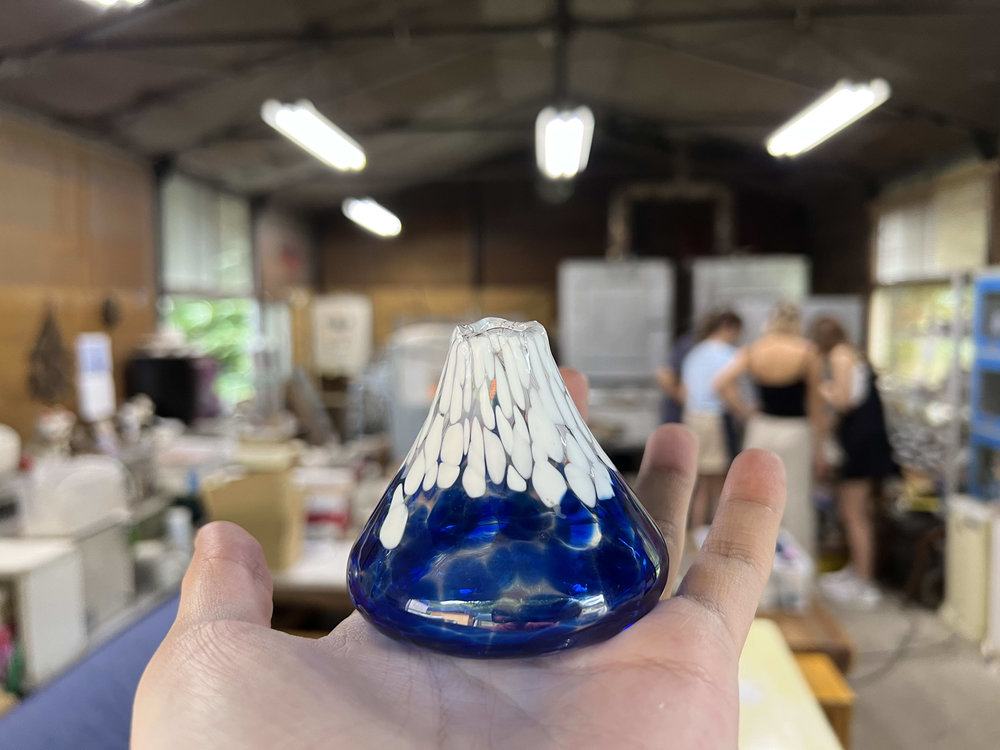
After getting our Mt. Fuji Passes at the ticket counter in Otsuki Station, we set out for our first activity of the trip… Glassblowing! We included this in our itinerary because we get to create our own mini-glass version of Mt. Fuji that we can take home.
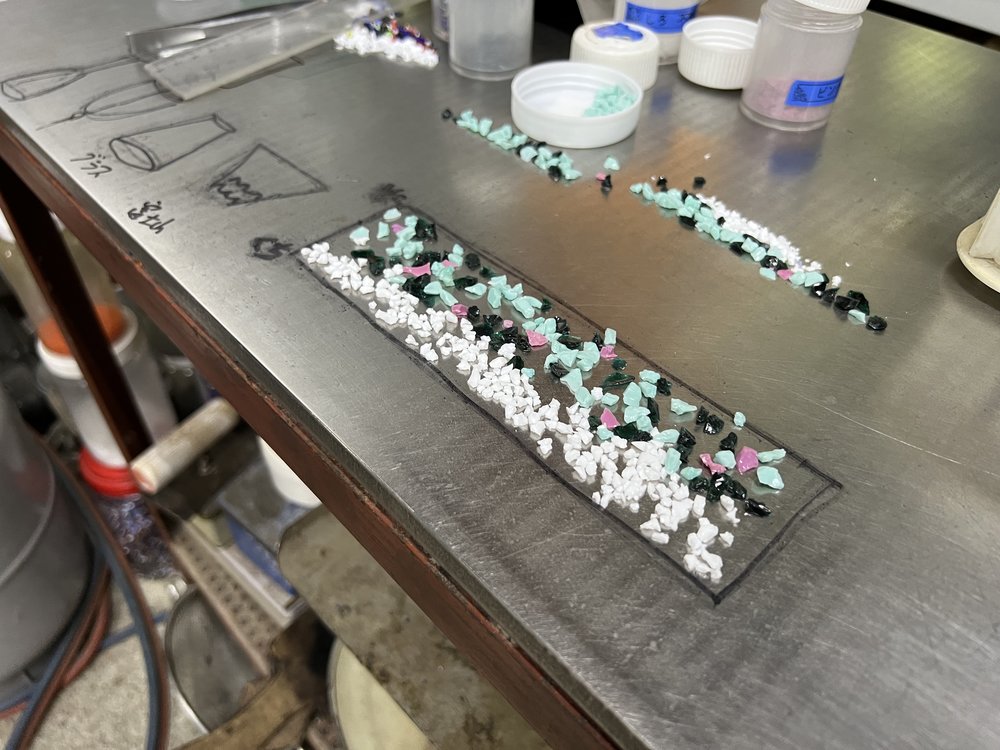
Each of us took about 30 mins to finish our creation. It was one of those experiences where you get into a deep calm and focus, almost as if in a meditative state — something many of us needed from the daily hustle of life! We scheduled our glassblowing experience on the first day because you’ll have to leave your masterpiece for a day to anneal or cool to its final form. You can choose to either go back and pick it up the next day or have it delivered to your hotel, which will be within 1-2 days. Because we were going to Kawaguchiko afterward, we opted for delivery.
To get to the glassblowing activity, you can take a bus from Otsuki Station to reach Shiraishi Glass Studio. Take the Fujikyu Yamanashi Bus bound for “Hamaiba” or “Kamimaki” and hop off at the Tsuji bus stop.
Klook Tip: Otsuki is also a nice place to drive around, so if you’re planning on booking a car rental, Shiraishi Glass Studio has parking spaces available.
Learn how to make soba
From making our very own Mt. Fuji souvenir, next was also making something with our own touch with soba making! We booked the last available class, which at the time was 3:30 PM, to give enough travel time from Otsuki.
You can actually get to the soba making class on foot, it’s only around a 12-minute walk from Kawaguchiko Station and you’ll get to have a nice stroll through the narrow streets and charming houses of Japan’s countryside.
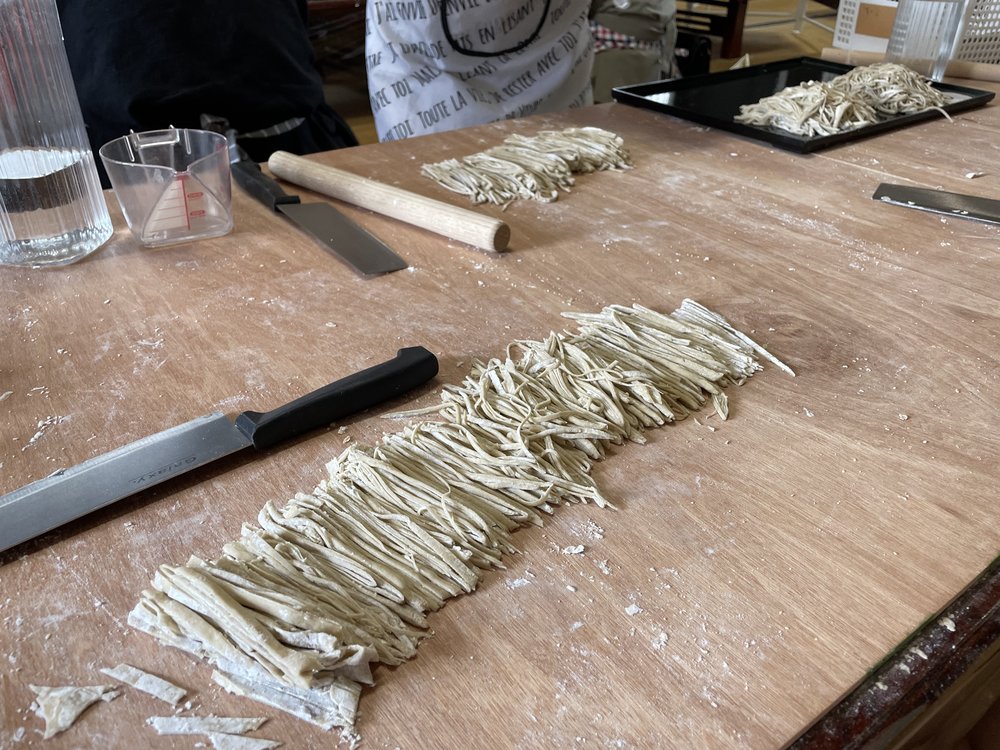
Like the glassblowing activity, soba making was also very calming. We took our time forming the dough, getting just about the right texture, then eventually slicing the dough manually (the challenge was to make sure the noodles weren’t too thick nor thin)! The atmosphere was perfect too, the sun was out, we could feel the summer breeze from the open window, topped off with soft jazz music playing in the background – easily my favorite vibe throughout the whole trip.
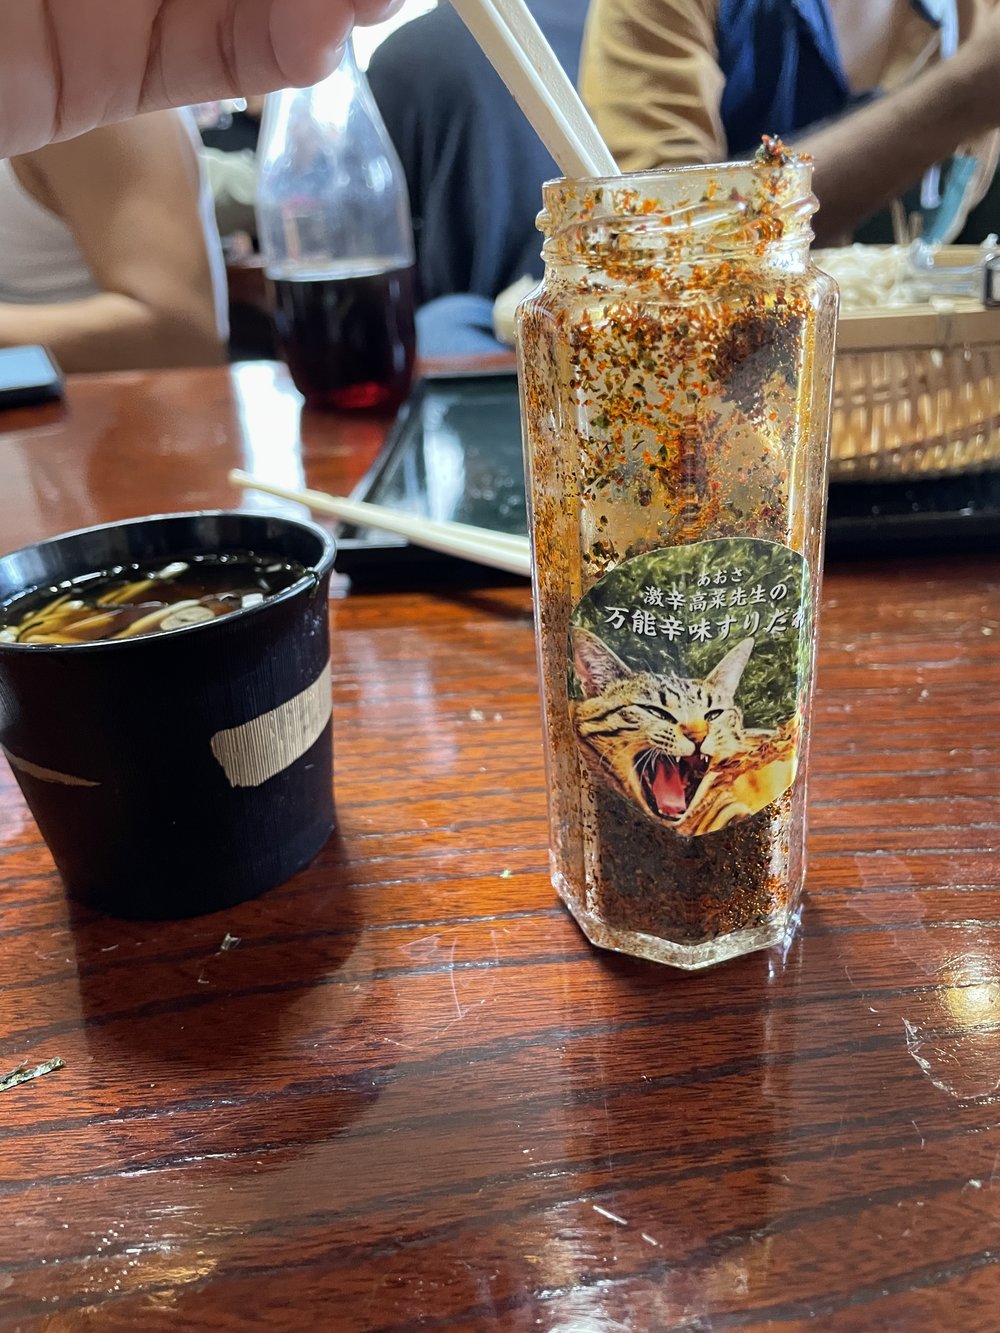
After prepping your soba, it’ll be cooked and served along with sauce and their brand of spices on the side (we bought a couple of bottles too, it’s insanely good and comes in different spice levels). We ended our first day of activities on the best note possible – with a filling and yummy early dinner.
As we headed back to Kawaguchiko Station, on the way was the famous Lawson with Mt. Fuji as the backdrop. Sadly, Mt. Fuji wasn’t visible when we passed; instead, we had a few bites and loaded up on some snacks that you can only find in Japan’s convenience stores (might as well)! There’s also a 7/11 right across if you want to try that viral smoothie.

At Kawaguchiko Station, we waited for the Fujikyu loop shuttle bus to get to the hotel at Highland Resort Hotel & Spa. Since we booked a luggage delivery service, our bags were already there, neatly lined up, and all we had to do was check-in.
If you have extra time, you can explore the area near the hotel. There are several restaurants nearby as well as a Don Quijote (yes, we did end up in Don Quijote… we couldn’t refuse).
Day 2
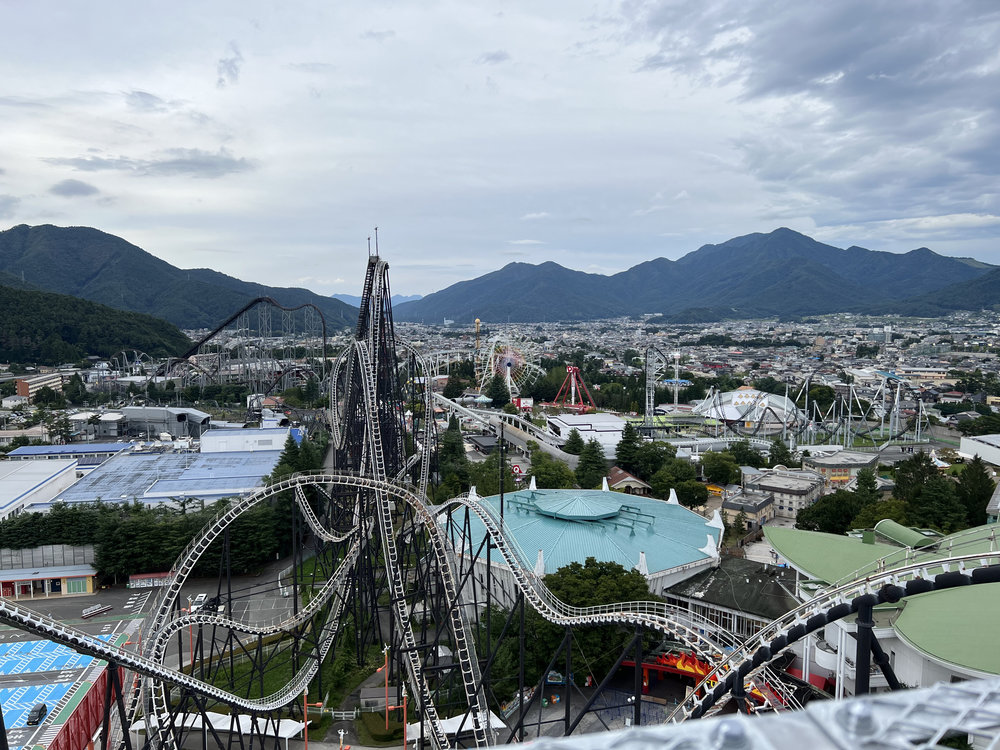
We started day two with a bang as Fuji-Q Highland was our first stop! We spent around 5-6 hours here, getting to as many rides as we could and trying out a whole lot of their mouthwatering food options – they have stalls and even a whole food court!
Enjoy insane coasters and drool-worthy eats at Fuji-Q Highland
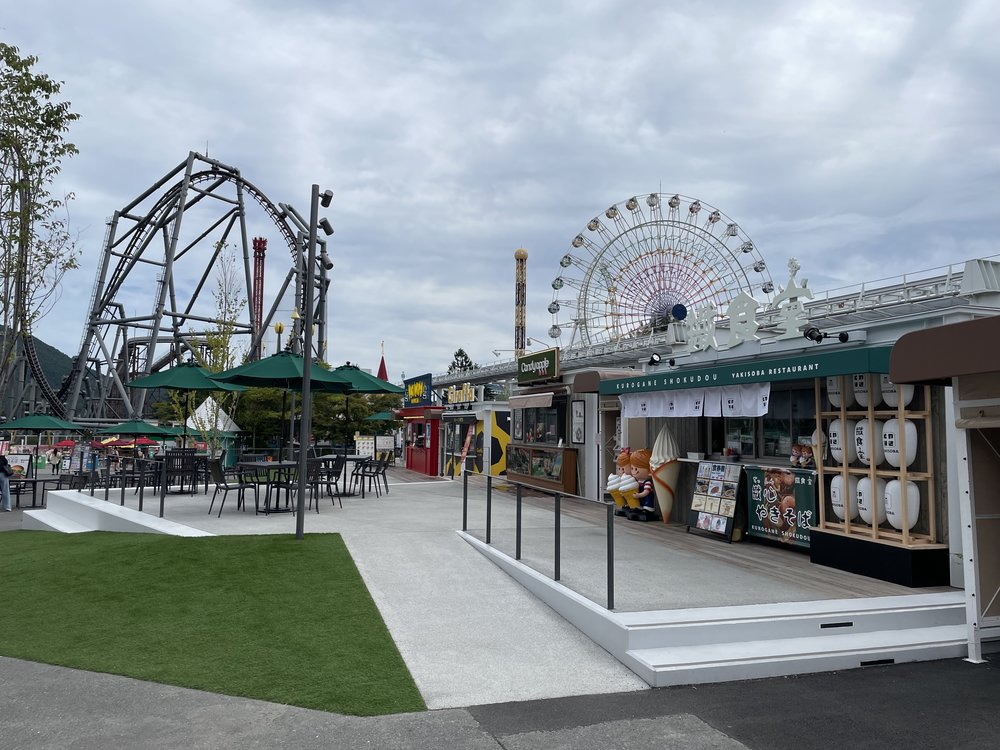
Fuji-Q Highland deserved a huge chunk of our itinerary, so we spent almost an entire day here. Trust us, you’d like to take your time not only for the rides but also for the eats and the views!
Klook Tip: For those squeamish when it comes to coasters, like myself, you can bring your own tumbler to readily hydrate as much as you need and at no extra cost (they have water dispensers in the food court). As you drink up, there’s also a park near the food court where you can ground yourself before hopping on another ride.
Some of the snacks we loved were the tornado potatoes (sliced potato that’s neatly stacked on a stick), strawberry candy (candied strawberries on a stick), and 10-yen bread (baked bread with cheese inside). Honestly, if you get dizzy easily, the food options are enough to pass the time while you wait for your adrenaline junkie friends.
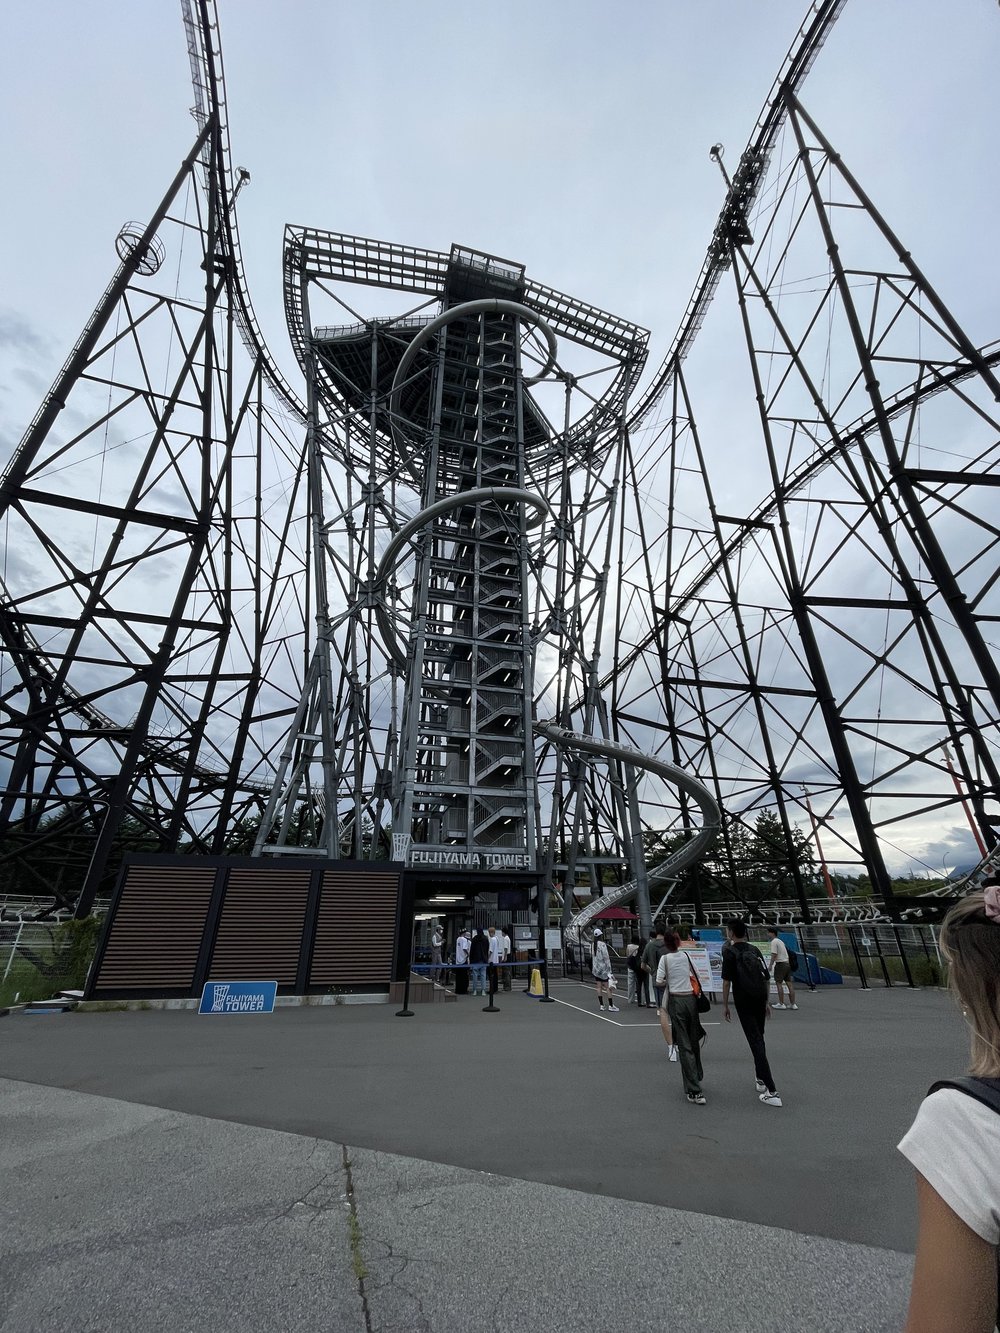
You can’t go to Fuji-Q Highland without riding the King of Coasters – FUJIYAMA. Back in 1996, it was given the title of the world’s tallest rollercoaster at 79 meters with a vertical drop of 70 meters!
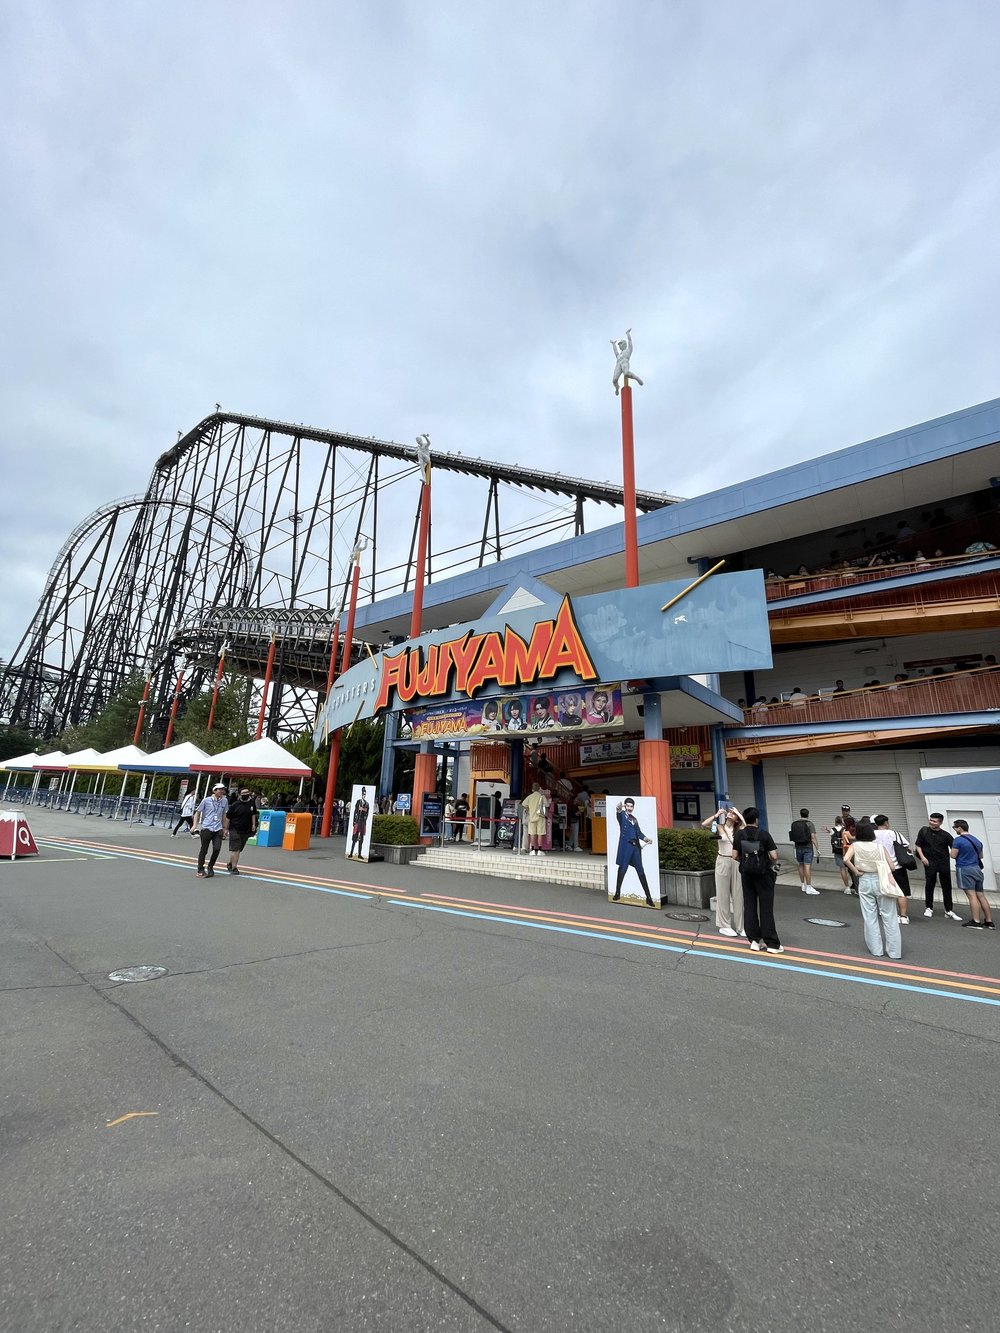
Klook Tip: There are free medium-sized lockers available per ride, so you don’t have to worry about your bags. If you really want to be handsfree throughout your Fuji-Q adventure, there are also coin lockers available at the entrance.
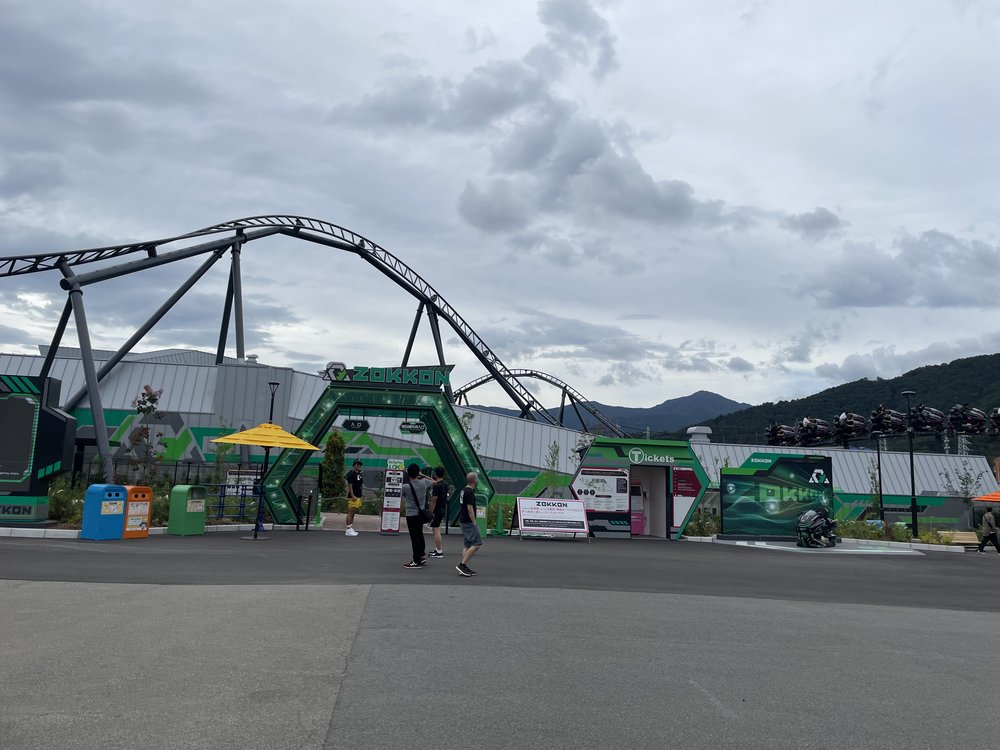
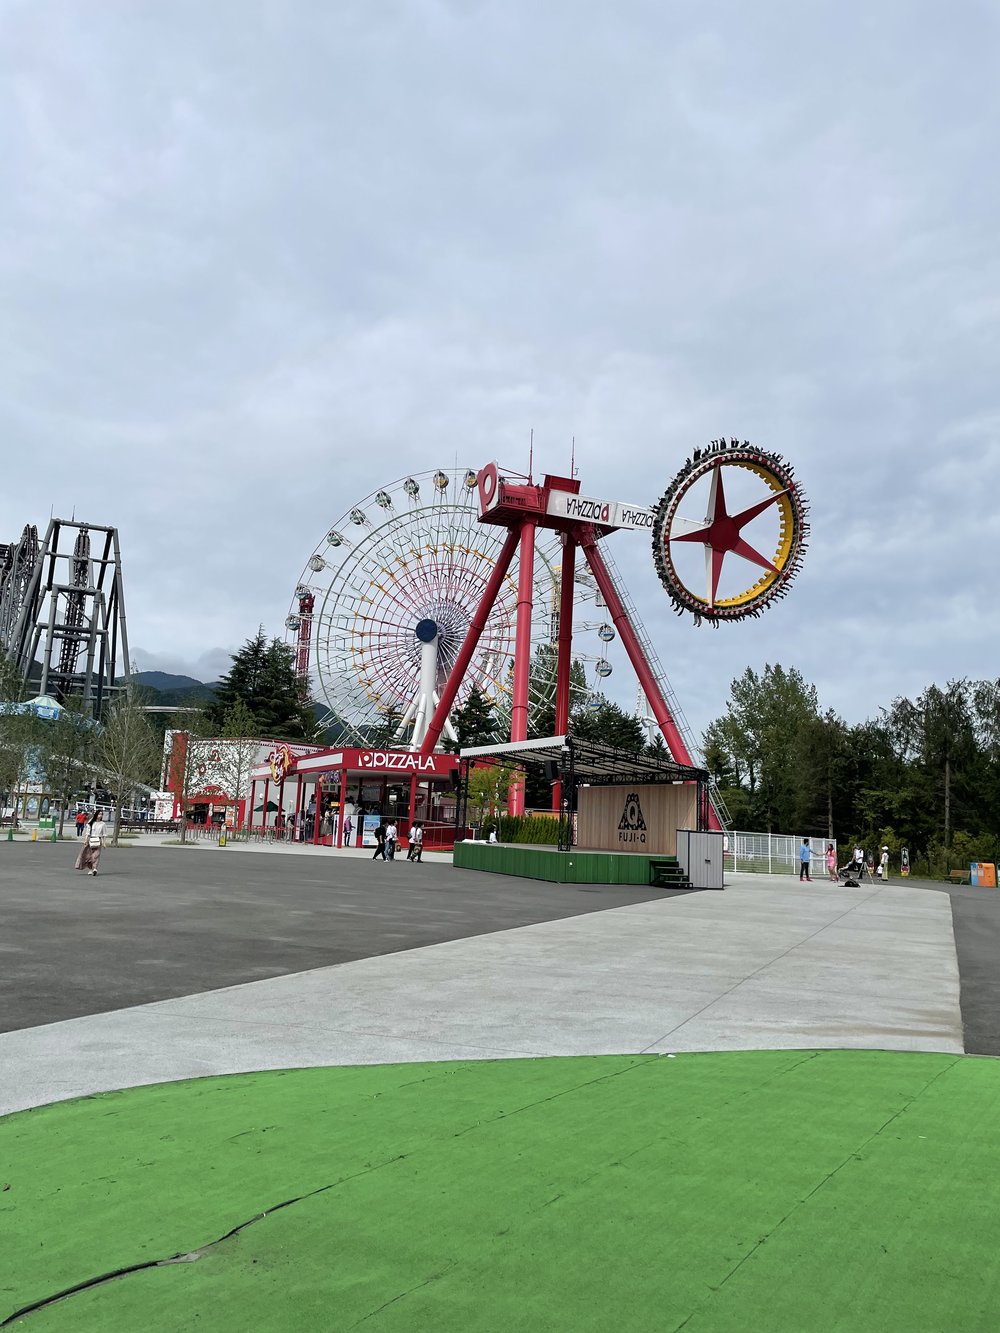
Another ride we also enjoyed was the Zokkon. It’s a motorbike-type of ride with a futuristic theme with steep turns, reverse mode, AND really fun music that goes with it! Don’t be fooled though, it’s equally as thrilling and insane as Fujiyama if you ask us. There are also other rides like Tondemina - Super Pendulum where not only are you swayed from side to side… the very disk itself turns.
If you really aren’t the type to get on rollercoasters or have younger kids with you, other and more calm attractions are available like the Thomas’ Treasure Hunt and Nia and Animal Coaster, to name a few. You can also still get spectacular views of Mt. Fuji without having to ride Fujiyama, just head over to Fujiyama Tower – they even have a tube slide at 120 meters that spirals from the very top of the tower if you’re up for it!
Rest and recover in a traditional onsen
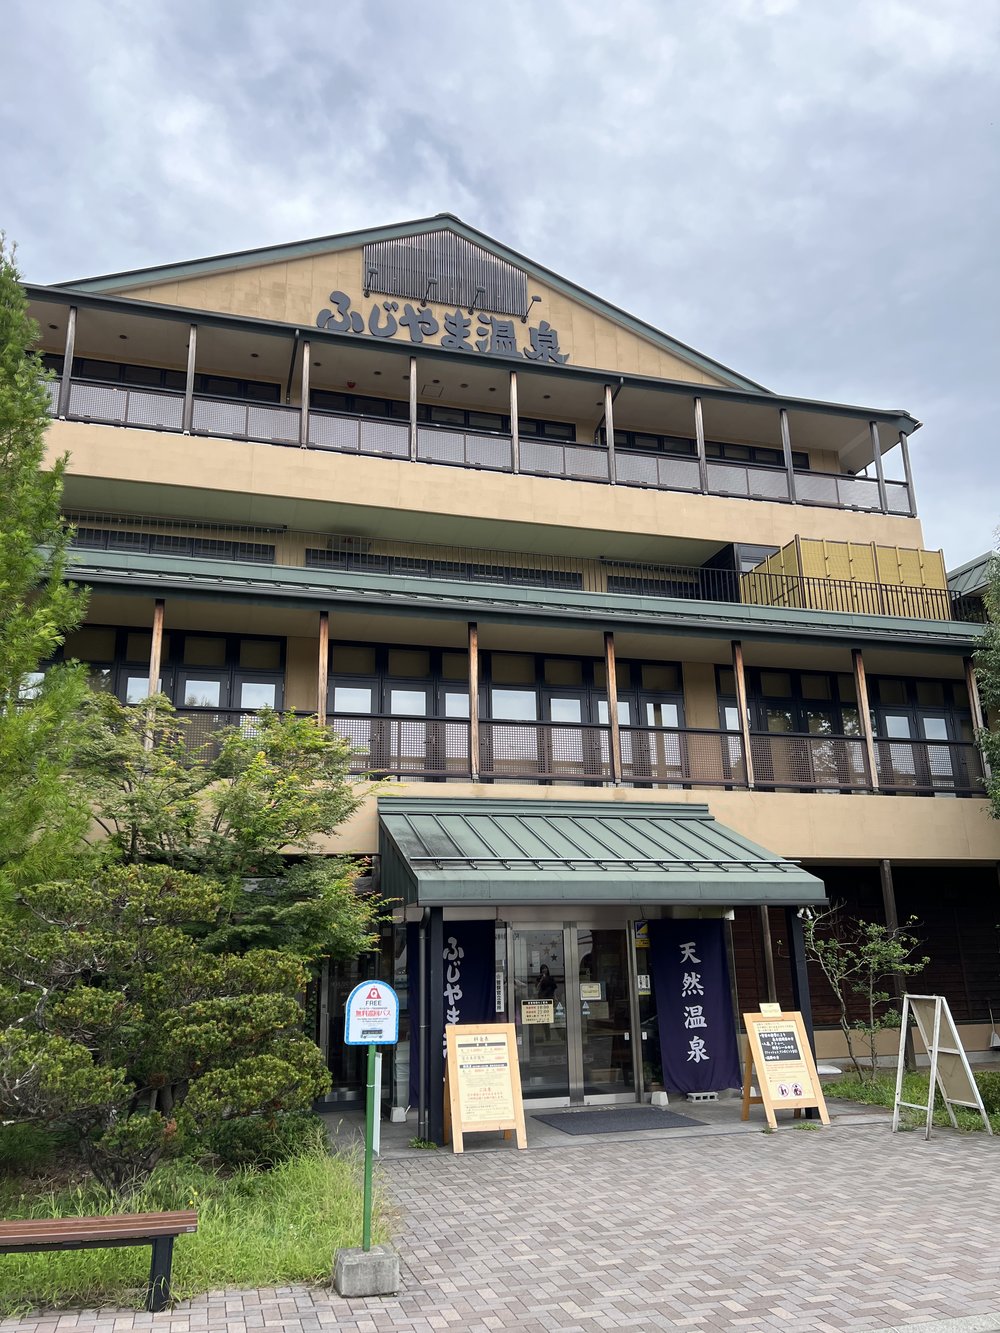
At this point in our overall trip to Japan, we were in a state where we needed to fully relax not just from having the time of our lives in record-breaking Fuji-Q rides but also from all the things we did in Tokyo before this trip! We thought, what better way to recover than in a traditional onsen near Mt. Fuji??
Because we were staying at Highland Resort Hotel & Spa, we had free access to Fujiyama Onsen. The hotel even has its own passageway, we just had to show our hotel key card at the front desk to register.
Klook Tip: While some onsens in Japan do allow tattoos, Fujiyama Onsen does not.
Day 3
To make the most of our Mt. Fuji trip, we squeezed in one more activity before heading back to Tokyo. From glassblowing our unique souvenir, making our own soba for dinner, to overcoming the most insane rollercoasters, it was time to soak up amazing views of Mt. Fuji from higher up vantage points.
See Mount Fuji in all its glory
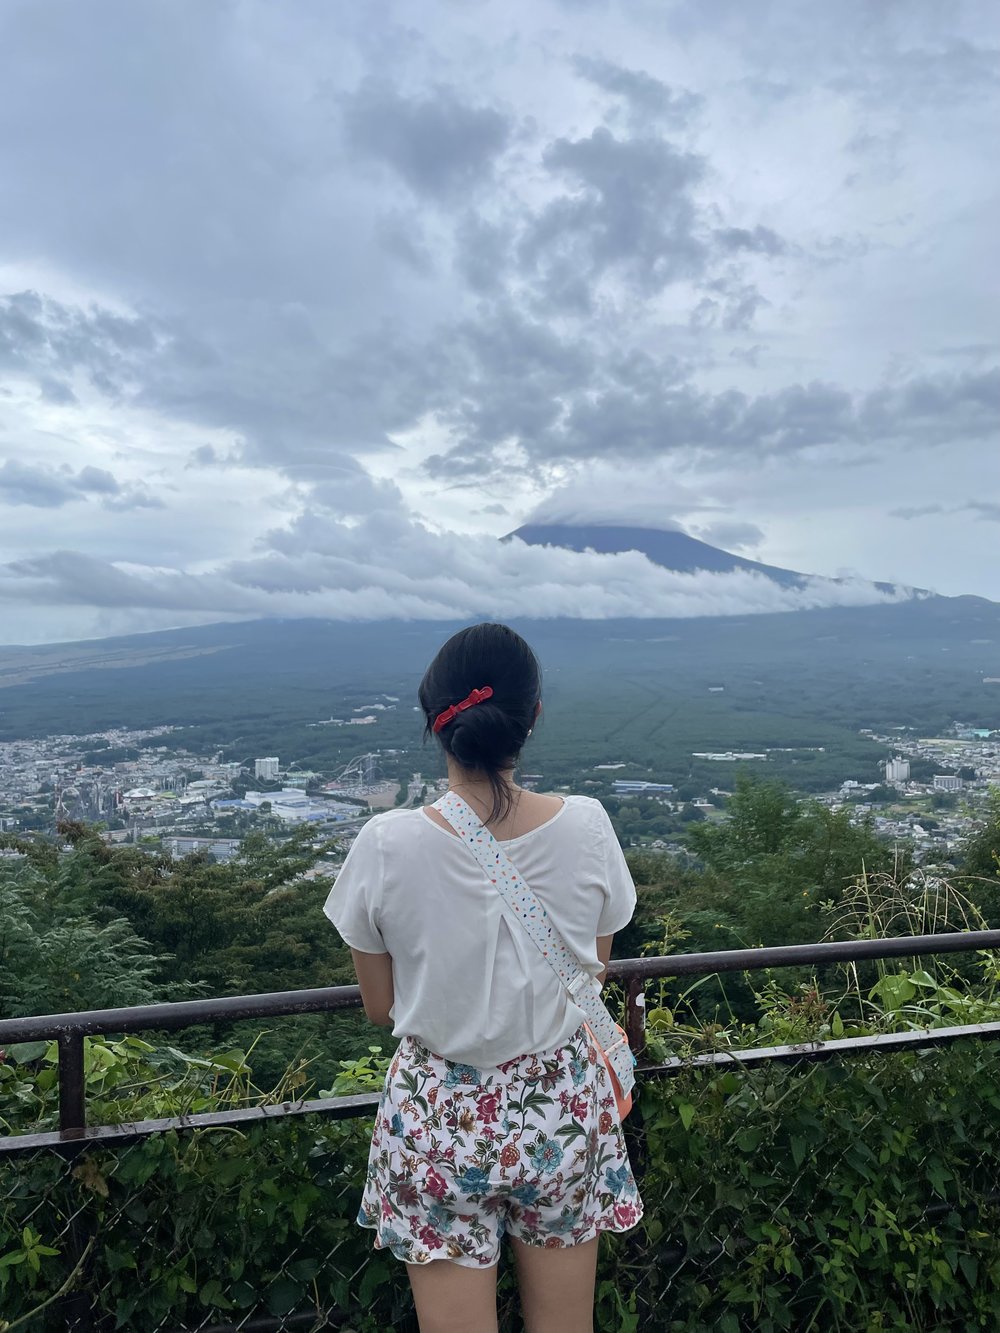
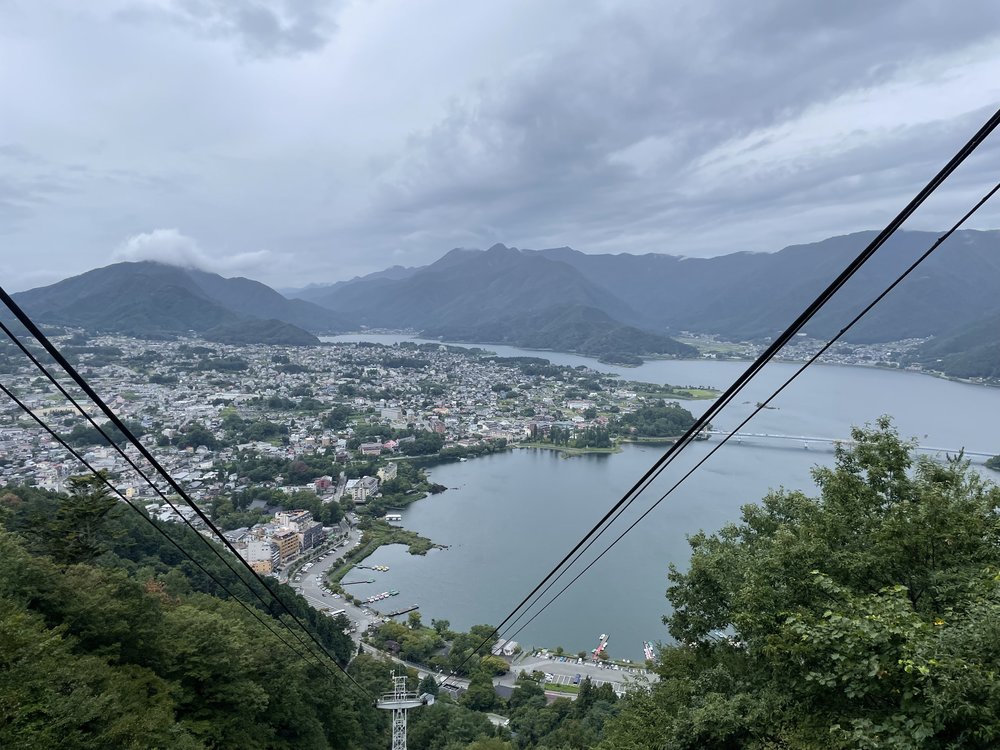
Our route to Lake Kawaguchiko, where the Ropeway and Excursion Ship was, was via the Kawaguchiko Sightseeing Bus (Red Line). You can take the free Fujikyu loop shuttle bus from the hotel to Kawaguchiko Station then wait for the Sightseeing Bus.
All we needed for the bus ride and admissions to both the Lake Kawaguchiko Sightseeing Boat and the Mt. Fuji Panoramic Ropeway was our tiny but mighty Mt. Fuji Pass.
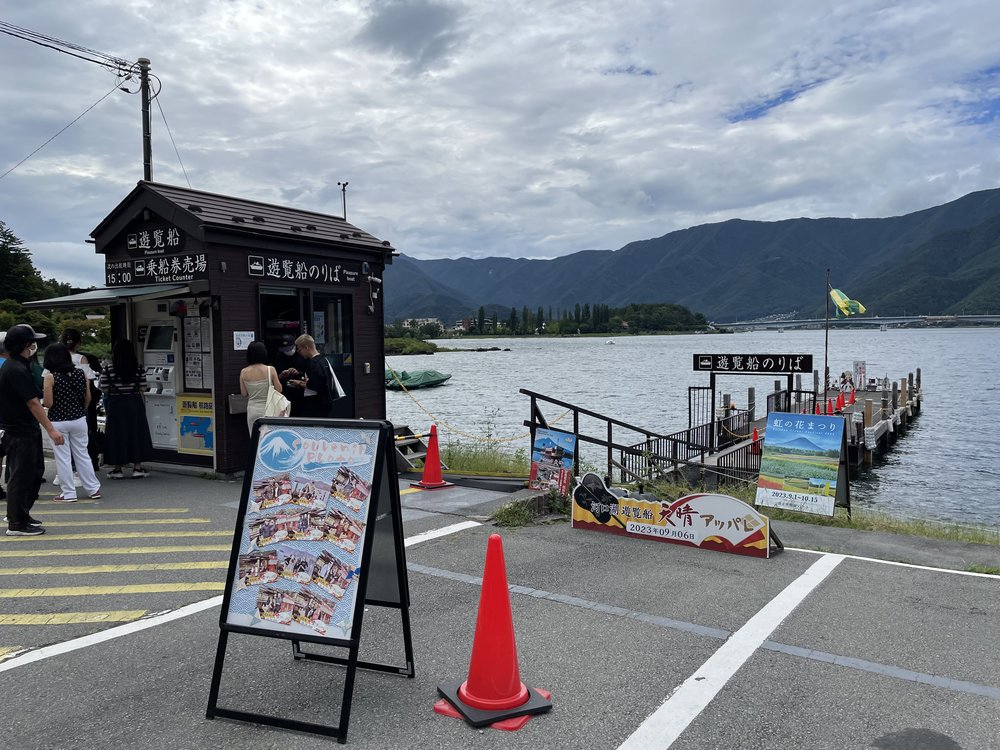
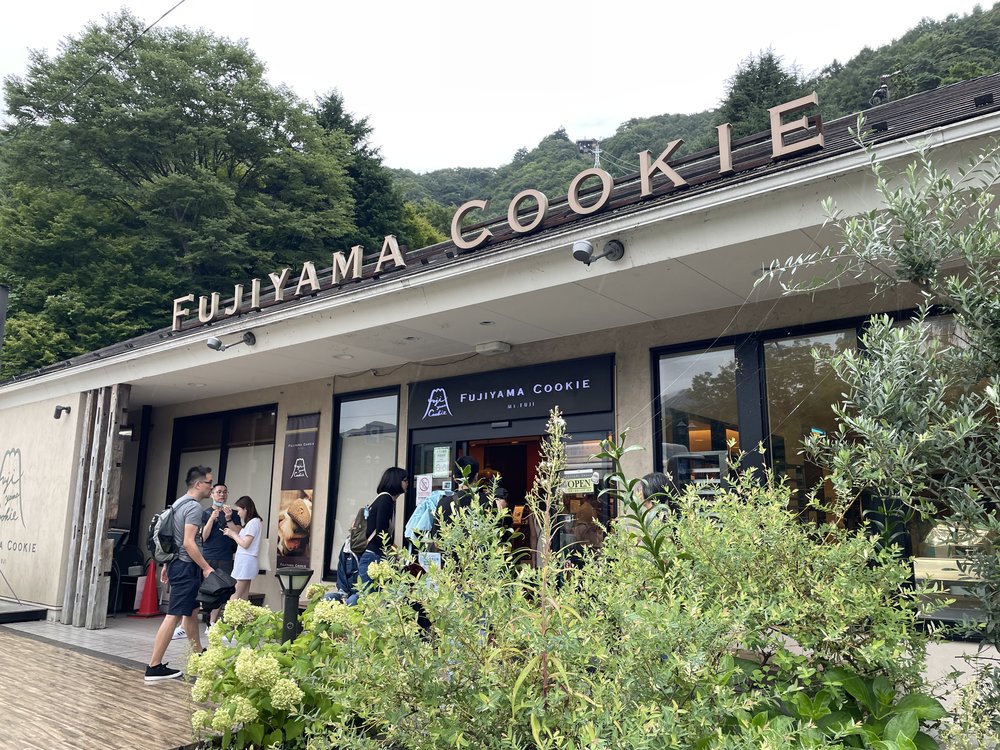
We scheduled both the sightseeing boat and ropeway together because they’re just walking distance from each other. We even got to treat ourselves to Fujiyama Cookie, a well-known cookie shop that makes handmade Fuji-shaped cookies with flavors like Earl Grey, Vanilla, Strawberry, Matcha, and Chocolate!
Klook Tip: If you have time or maybe when you plan another trip (it’ll take you 6 hours), there’s a hiking trail to Mt. Mitsutoge (includes Mt. Kaiun, Mt. Osutaka, and Mt. Kenashi) where you can get even greater vantage points of Mt. Fuji.

Ready for your trip to Fujigoko?
Now that you have a better grasp of what a 3D2N Mount Fuji itinerary looks like, remember to book your Japan essentials too!
🍣 Japan Essentials🍣
🚅Trains & Airport Transfers
📌Mobile Data & Metro Passes
Like what you see? Sign up now and join the Klookada! 🤩
Enjoy 5% off your first app booking when you use the promo code <BETTERONAPP>. T&Cs apply.


![Guide to Ocean Park Hong Kong: From Adorable Pandas to Thrilling Rides [Updated]](https://res.klook.com/image/upload/fl_lossy.progressive,q_85/c_fill,w_160,h_104/v1758794054/mcs1pmgkspcg6b53qb8x.jpg)