When should I set up an Access Point Name (APN) and how can I do it?
I. When to set up an APN You need to manually set up your Access Point Name (APN) if:
- Your eSIM was installed and activated but you can’t connect to the internet at your destination.
- You see a prompt on the Klook app instructing you to configure your APN.
II. How to set up an APN Step 1: Find your APN details
- On Klook app:
- Log in and go to Account > Bookings.
- Select your eSIM booking and tap “View APN Setup Guide” or “View guide” under About your eSIM.
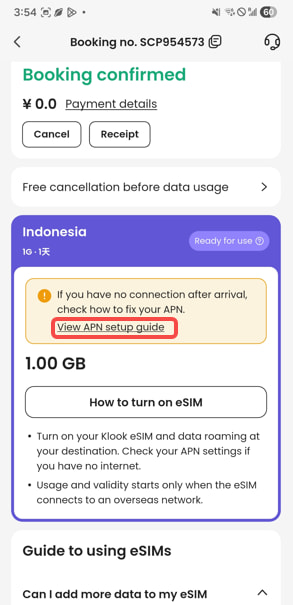
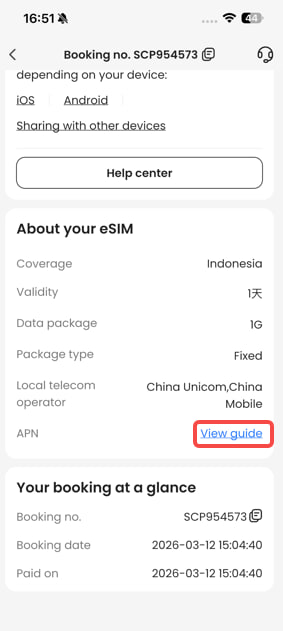
- View your APN details.
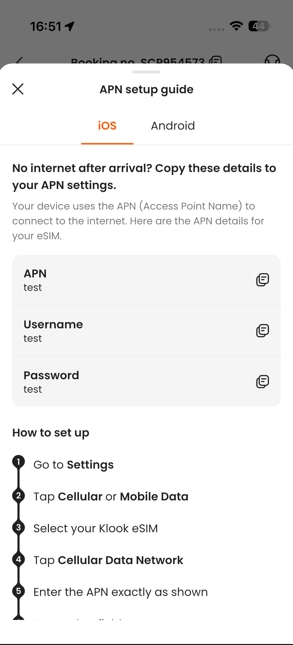
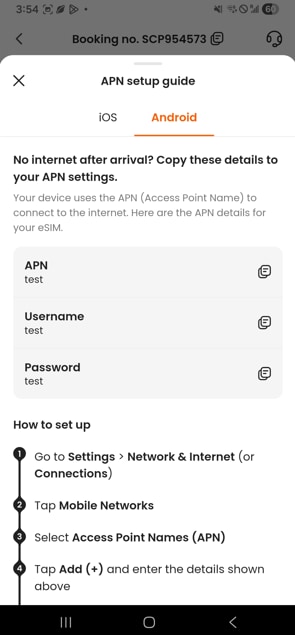
- On Klook web: APN information is available on 1) Klook voucher and 2) booking details page.
Klook Voucher:
- Log in, click your profile icon and select Bookings.
- Find your eSIM booking and click See voucher.
- Scroll down to the Product details section.
Booking details page:
- Log in, click your profile icon and select Bookings.
- Click your eSIM booking.
- Scroll to the Product details section.
- Look for the Setup tips subsection.
Step 2: Configure the APN on your device For iOS (iPhone/iPad):
- Go to Settings > Mobile Service (or Cellular).
- Select your Klook eSIM under Cellular Plans.
- Tap Mobile Data Network.
- Enter the APN details shown on the Klook app, in lower case and without spaces.
- Tip for hotspots: If you wish to share data, scroll down to the "Personal Hotspot" section and enter the APN details in your booking.
- Leave all other fields blank.
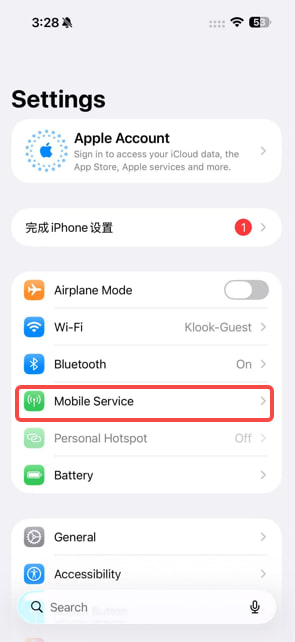
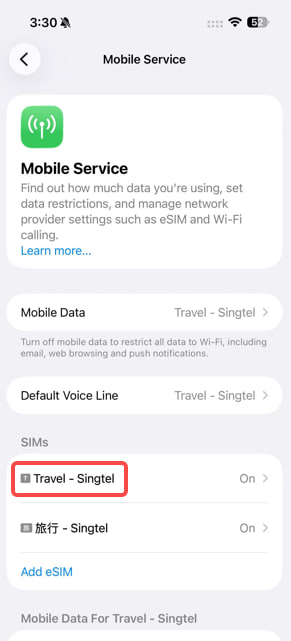
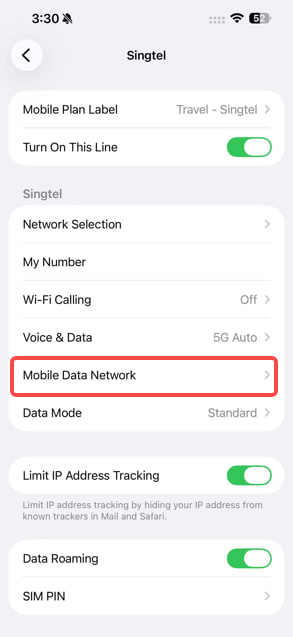
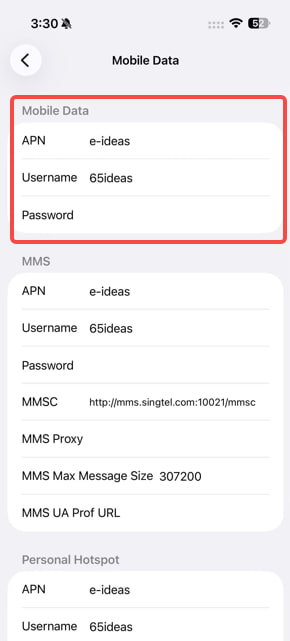
For Android (Samsung, Pixel, etc.):
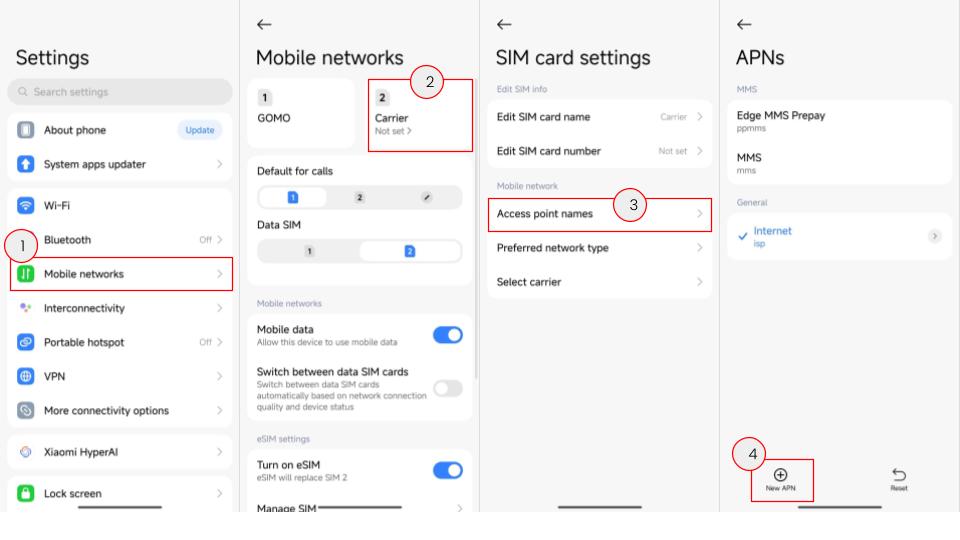
- Go to Settings > Connections (or Network & Internet).
- Tap Mobile networks > Access Point Names.
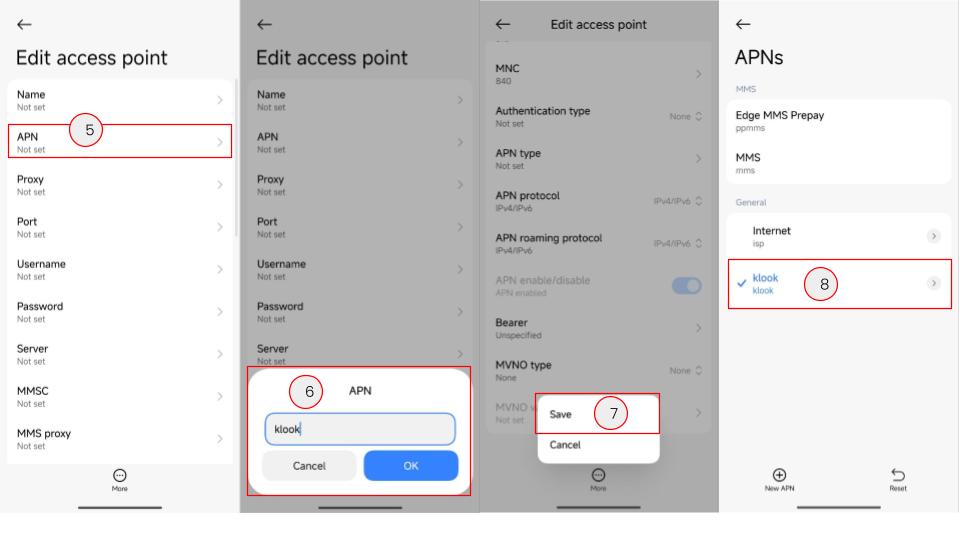
- Tap Add (+) or the three dots menu to create a new APN.
- Enter APN name (e.g., "plus.4g") and details.
- Fill in other fields (Username, Password, Auth Type) only if relevant details are provided on your booking details.
- Important: Tap the menu icon and select Save. Then, ensure the new APN is selected.
III. What to do if I still can’t connect to the internet after setting up the APN?
- Double-check if your eSIM is set as the preferred data source in your device settings.
- Restart your device and try again.
- Ensure the APN details you entered are matching the details on your Klook booking. Even a single character difference will prevent connectivity.
- Ensure data roaming is enabled on your device for the eSIM.
- If the issue persists, go to help center and reach out to our customer support via live chat.
Was this information helpful?
Other FAQs in "eSIM"
- What devices are compatible with eSIM?
- [In-app activation] How can I activate the eSIM on iOS devices?
- [QR code activation] How can I activate the eSIM or share the eSIM with a QR code?
- [In-app activation] How can I activate the eSIM on Android devices?
- How can I activate the eSIM on my device?
- Can I scan one QR code with multiple devices?
- Should I turn on data roaming when I'm using the eSIM?