How can we help you?
Browse popular FAQs
[In-app activation] How can I activate the eSIM on iOS devices?
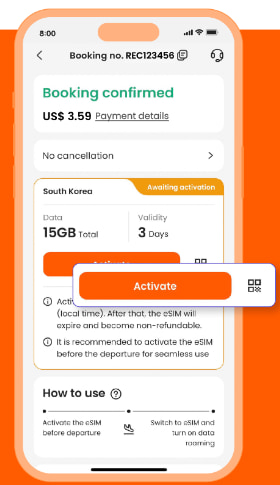
- Step 1. Open the Klook app. Go to Account > Bookings. Tap the “Activate” button. (You can also scan the QR code on your voucher from Settings > Cellular > SIMs > Tap Add eSIM > scan QR code.)
- Step 2. Make sure to read the reminder before activation. Don’t worry - your data usage won’t start immediately upon activation.
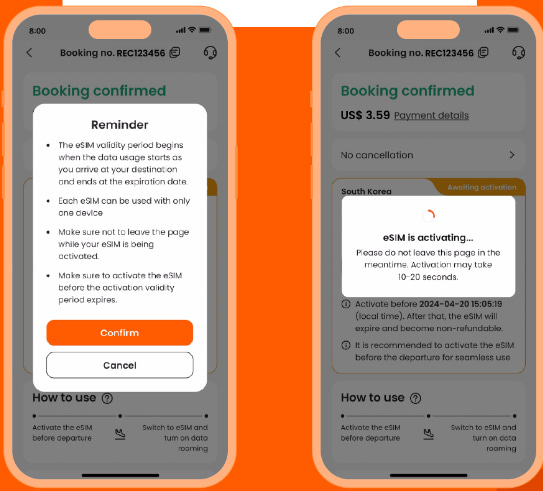
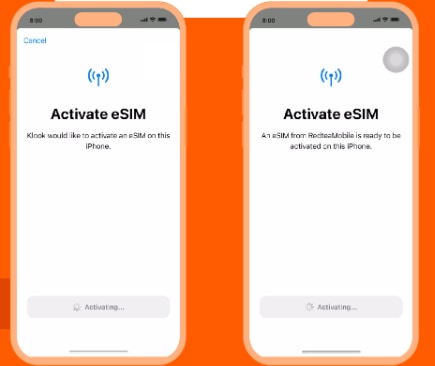
- Step 3. Activate the eSIM on a stable connection. Please do not leave the page while the eSIM is being activated.
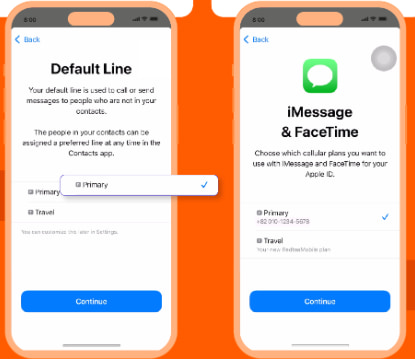
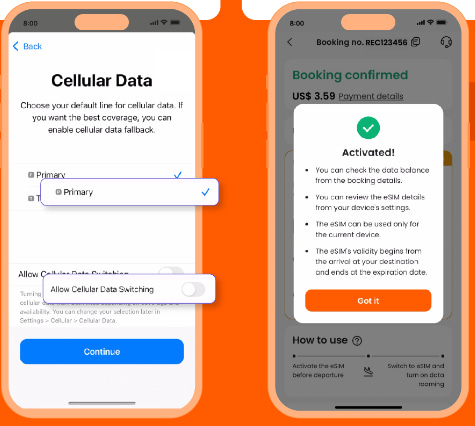
- Step 4 & Step 5. This is to use the eSIM for calling and iMessage right away. Select the “Primary” line before arriving at your destination.
- Step 6 & Step 7. Set the “Primary” line to use cellular data until you arrive at your destination, and toggle off “Allow Cellular Data Switching”. This way, you can ensure the eSIM data won’t be used in advance.
- Step 8. When you arrive at your destination, turn on the eSIM line and turn on data roaming.
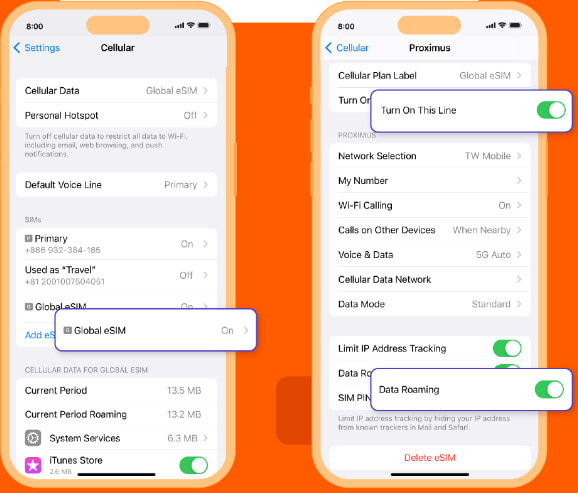
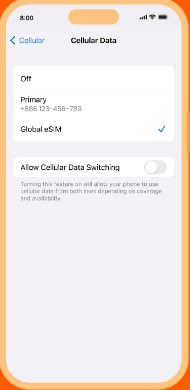
- Step 9. Change the cellular data setting to use your eSIM.
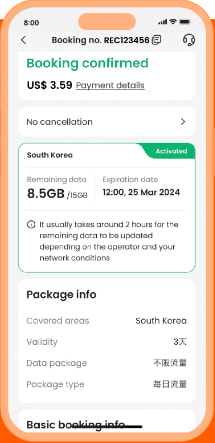
- Step 10. Check the eSIM status in your Klook booking. Tap the icon on the top right corner to get help with any issues. Please note that checking the data balance on the app is enabled only for the “Data in total” packages.
[In-app activation] How can I activate the eSIM on Android devices?
- Step 1 & 2. Open the Klook app. Go to Account > Bookings. Tap the “Activate” button. (You can also scan the QR code on your voucher from Settings > Cellular > SIMs > Tap Add eSIM > scan QR code.) Please read the reminder and activate the eSIM. Don’t worry - your data usage won’t start immediately upon activation.
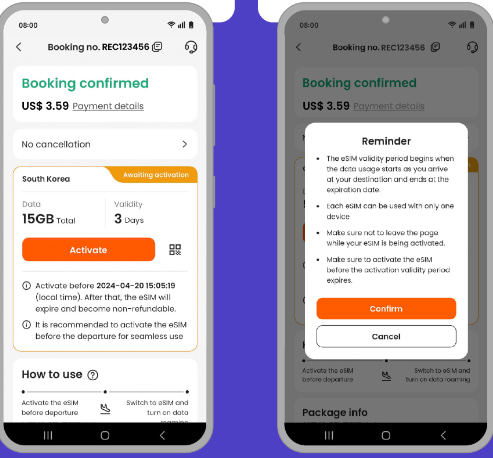
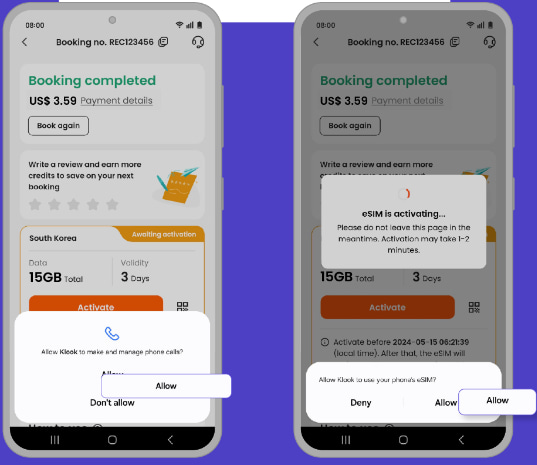
- Step 3. Allow the eSIM to be installed on your device.
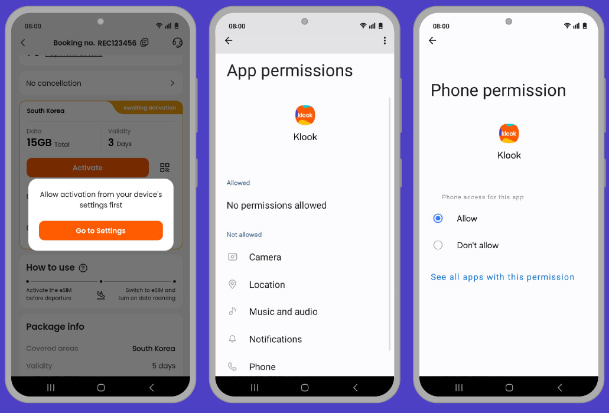
- Step 4. If you didn’t allow the eSIM installation right away, you can go to the device’s settings to allow it later.
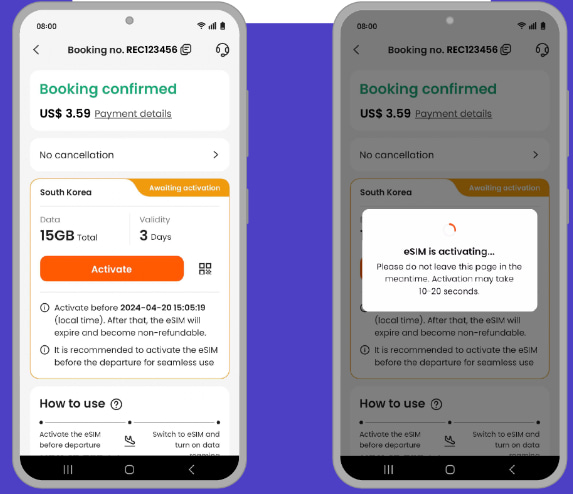
- Step 5. Activate the eSIM on a stable connection. Please do not leave the page while the eSIM is being activated.
- Step 6. Give the eSIM a name.
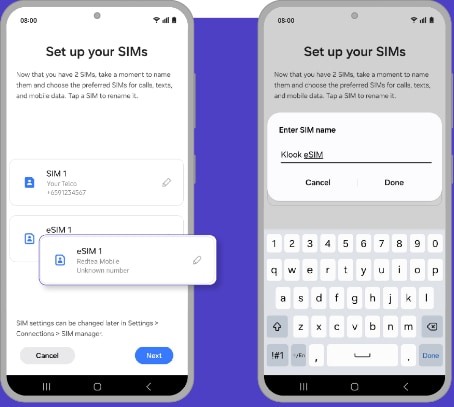
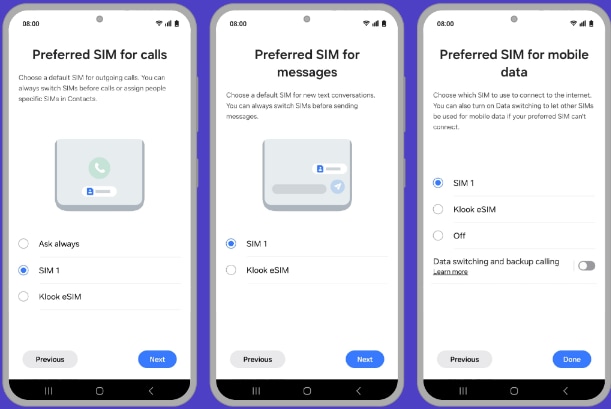
- Step 7. Set to use your original SIm to be used for calling, messaging, and data use until arrive at your destination.
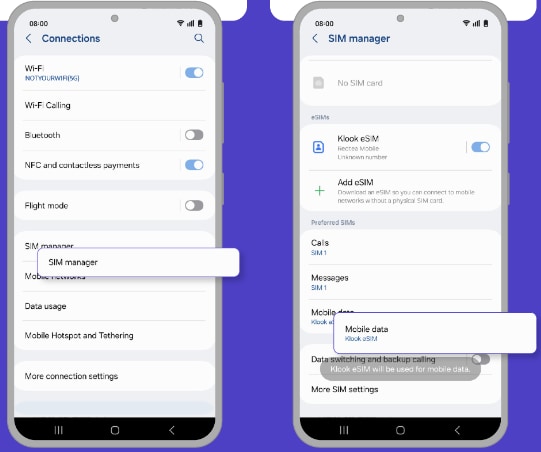
- Step 8 & 9. When you arrive at your destination, turn on the eSIM line and switch mobile data to the eSIM.
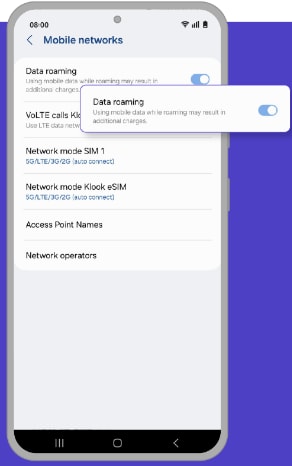
- Step 10. Turn on data roaming. You can check the eSIM status in your Klook booking. Tap the icon on the top right corner of the booking details page to get help with any issues. Please note that checking the data balance on the app is enabled only for the “Data in total” packages.
When will I receive my booking confirmation?
This depends on the policy of your activity.
- For activities with instant confirmation: You will receive your booking confirmation email within 5 minutes of making your booking.
- For activities without instant confirmation: You will receive your booking confirmation within 24-48 hours of making your booking. Check the package details > Confirmation section of your booking/activity page for the booking confirmation time for your activity.
If you have not received your booking confirmation even after the time mentioned above, please refer to this article.
How can I cancel/refund my booking?
Check your activity's cancellation policy.
- If your activity offers free cancellation:
You can cancel the booking yourself within the cancellation period stated on your booking by following these steps:
- Click on your profile picture in the top right hand corner of the screen.
- Go to the Bookings page
- Find the booking you want to cancel and select "Apply for refund"
- Select refund reason, quantity and then select "Next"
You will then receive an email confirming that your order has been cancelled. You cannot use your previous voucher to participate in this activity.
- If your activity has a conditional cancellation: policy
- Please check the cancellation policy listed on the Activity Page or your voucher on your Bookings page
- If your booking fulfils the stated conditions, get in touch with Klook's Customer Support for help in cancelling your booking.
- If your activity has a no cancellation policy
- No cancellation/refunds will be provided for this activity. We apologise for any inconvenience caused.
Notes:
No refunds will be provided after you have successfully completed your booking/activity.
If you need to contact Klook Customer Support for help cancelling your booking, please provide us with the following information to help us resolve your inquiry more quickly.
Full name (the same name used for the booking)
Your Booking Reference ID (looks like: ABC123456)
Activity name
Any relevant supporting documents to validate your cancellation requests (flight cancellation notices, medical documents, death certificates, etc.)
How come my booking was automatically cancelled?
This is usually because of one of these reasons:
- The payment wasn’t completed in time
- The operator couldn't get your ticket issued For further details, please reach out to our customer support.